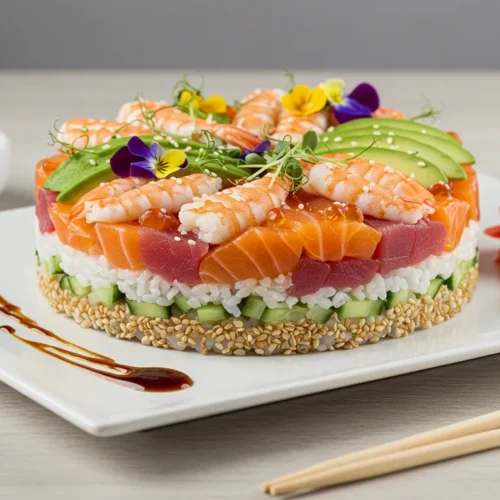
sushi cake
Create a delicious and visually stunning sushi cake with fresh ingredients! Perfect for any occasion, this easy recipe is a sushi lover's dream.
Ingredients
The Base
- Sushi rice – The foundation of every sushi dish! Look for short-grain rice which will give you that sticky, tender texture. You’ll also need to season it with rice vinegar, sugar, and salt for that classic sushi flavor.
- Rice vinegar – Adds that signature tangy flavor to the rice.
- Sugar and salt – To balance the rice vinegar and enhance the rice’s flavor.
Fresh Toppings & Fillings
- Sashimi-grade fish – Fresh salmon tuna, and yellowtail are the best options, but don’t hesitate to explore other options like smoked salmon or shrimp if you prefer. Just make sure it’s sushi-grade for safety.
- Avocado – Its creamy texture is perfect for adding richness and balance.
- Cucumber – Thinly sliced cucumber provides a refreshing crunch.
- Radish – A bit of heat and color; thinly slice it for extra crunch and freshness.
For Extra Flavor
- Spicy mayo – A must-have topping for that creamy spicy kick. It’s a simple blend of mayo and Sriracha, but you can adjust the heat level to your liking.
- Tobiko fish roe – This adds a nice pop of color and texture.
- Sesame seeds – Sprinkle some on top for a delicate crunch and a little extra flavor.
Optional Garnishes
- Scallions – Thinly sliced for that mild onion flavor.
- Microgreens – For a fresh decorative touch.
- Soy sauce – Serve alongside for dipping or drizzle it on top for an added umami boost.
Instructions
Step 1: Prepare the Sushi Rice
- Start by cooking your sushi rice according to the package instructions. Make sure it’s slightly sticky but not too wet.
- Once the rice is done, transfer it to a large bowl and gently mix in the rice vinegar, sugar, and salt while it’s still warm. This will give your rice that signature sushi flavor. Let the rice cool to room temperature.
Step 2: Assemble the Layers
- Base Layer: Begin by layering your sushi rice into the bottom of a round cake pan (about 8-10 inches). Press the rice down gently with a spoon to create a firm, even base.
- Second Layer (Fish/Vegetables): Add your fish or vegetable layer. This could be sliced salmon, tuna, or avocado for a vibrant contrast. You can also get creative here by adding some cucumber or mango for extra texture and flavor.
- Third Layer (Additional Ingredients): Next, layer your pickled ginger, seaweed, or any other ingredients you’d like to include. You could even add a sprinkle of sesame seeds for a little extra crunch.
Step 3: Press and Set
- Once all your layers are in the pan, use the back of a spoon to gently press everything down, helping the layers hold together.
- Allow the cake to sit in the fridge for about 30 minutes. This will help the layers set and make it easier to slice later.
Step 4: Garnish and Serve
- After the cake has chilled, carefully remove it from the pan and transfer it to a serving plate.
- Now, it’s time to add the finishing touches! Top the cake with more avocado, fish, microgreens, or a drizzle of spicy mayo for added flavor and presentation.
- Garnish with sesame seeds, coriander, or even a few edible flowers for that final wow factor!
Step 5: Slice and Enjoy
- To slice your sushi cake, use a sharp knife and make gentle cuts to avoid smooshing the layers. Serve each slice with a small bowl of soy sauce for dipping, and enjoy!
Notes
Nutrition Information (per serving)
- Calories: 320
- Fat: 10g
- Saturated Fat: 1g
- Carbohydrates: 48g
- Fiber: 2g
- Sugars: 4g
- Protein: 8g
- Sodium: 400mg
- Cholesterol: 30mg