Graduation Cakes
Discover delicious and creative graduation cakes ideas to celebrate your big day with a show-stopping dessert. Perfect for any graduation celebration!
Ingredients
Cake Base Ingredients:
- To make a moist and flavorful cake you'll need the following staples:
- 2 ½ cups all-purpose flour – This gives the cake structure and a soft crumb.
- 2 cups granulated sugar – Sweetens the cake and helps it rise.
- 1 tablespoon baking powder – Ensures the cake has a light fluffy texture.
- ½ teaspoon salt – Balances out the sweetness for a well-rounded flavor.
- 1 cup unsalted butter – Adds richness and moisture to the cake.
- 4 large eggs – These provide structure and bind the ingredients together.
- 1 cup whole milk – Creates a smooth batter for a tender cake.
- 2 teaspoons vanilla extract – The secret to adding that comforting familiar flavor.
Flavor Variations (Optional):
- You can easily customize the flavor of your cake to make it truly special:
- For a chocolate cake: Add ½ cup of cocoa powder to the dry ingredients for a rich decadent flavor.
- For a fruity twist: Add 1 cup of fresh berries or citrus zest for a light refreshing taste.
- For a nutty flavor: Fold in ½ cup of chopped walnuts almonds, or pecans to bring in a crunchy texture and earthy taste.
Frosting and Decoration Ingredients:
- Now let’s talk about that irresistible frosting that will make your cake shine:
- 2 cups heavy cream – The base for a rich smooth frosting.
- 4 cups powdered sugar – Sweetens the frosting while making it light and fluffy.
- 1 teaspoon vanilla extract – Enhances the flavor and rounds out the sweetness.
- Food coloring – Customize your frosting to match the school colors or party theme.
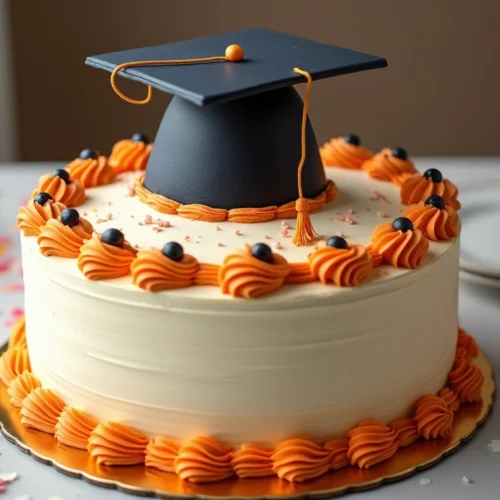
- Decorative elements: Consider adding edible glitter sprinkles, or fondant decorations like graduation caps, diplomas, or the graduate’s name.
Instructions
Step 1: Preheat and Prep Your Pans
- Start by preheating your oven to 350°F (175°C). This ensures your cake bakes evenly. While the oven heats up, grease and flour two 9-inch round cake pans (or use parchment paper for added security). This step will make sure the cake comes out easily once it’s done.
Step 2: Combine the Dry Ingredients
- In a medium-sized bowl, whisk together your dry ingredients:
- 2 ½ cups all-purpose flour
- 1 tablespoon baking powder
- ½ teaspoon salt
- This simple mixture is the backbone of your cake, creating a light and airy texture. Set it aside for now as you move on to the wet ingredients.
Step 3: Cream the Butter and Sugar
- In a large mixing bowl, beat 1 cup unsalted butter and 2 cups granulated sugar until light and fluffy. Use a hand mixer or stand mixer on medium speed for about 3-5 minutes. This step incorporates air into the batter, which is key to getting that soft, tender crumb we all love.
Step 4: Add Eggs and Vanilla
- Add the 4 large eggs one at a time, mixing well after each addition. This allows the eggs to fully incorporate and helps give structure to your cake. Then, stir in 2 teaspoons vanilla extract to enhance the flavor.
Step 5: Alternate Adding Dry Ingredients and Milk
- Now, it’s time to mix everything together! Start by adding a third of your dry ingredients to the butter mixture, then pour in 1 cup whole milk. Alternate between adding more dry ingredients and the rest of the milk, mixing on low speed. This method helps prevent overmixing and ensures a smooth batter.
Step 6: Bake Your Cakes
- Divide the batter evenly between the two cake pans, spreading it out with a spatula for an even bake. Place the pans in the oven and bake for 25-30 minutes, or until a toothpick inserted into the center of the cakes comes out clean. Each oven is different, so keep an eye on your cakes, especially toward the end!
Step 7: Cool the Cakes
- Once baked, let the cakes cool in the pans for about 10 minutes. Then, transfer them to a wire rack to cool completely. Cooling is essential because if you frost the cake too soon, the frosting can melt right off. Patience is key here!
Step 8: Frost and Decorate
- Once the cakes are completely cool, it’s time to add your frosting! Start by applying a thin layer of frosting over the entire cake to lock in any crumbs (this is called a crumb coat). Place the cake in the fridge for about 15-20 minutes to set the crumb coat.
- After the crumb coat has set, spread a thicker layer of frosting over the top and sides of the cake. You can use a spatula for a smooth finish or a piping bag for a more decorative effect. This is where you can get creative—decorate with edible glitter, fondant graduation caps, or even school colors to match the theme of the celebration.
Notes
Nutrition Information (per serving):
- Calories: 400
- Fat: 22g
- Saturated Fat: 8g
- Carbohydrates: 47g
- Fiber: 1g
- Sugars: 35g
- Protein: 4g
- Sodium: 200mg
- Cholesterol: 55mg
- Vitamin A: 6% of daily value
- Calcium: 2% of daily value
- Iron: 6% of daily value