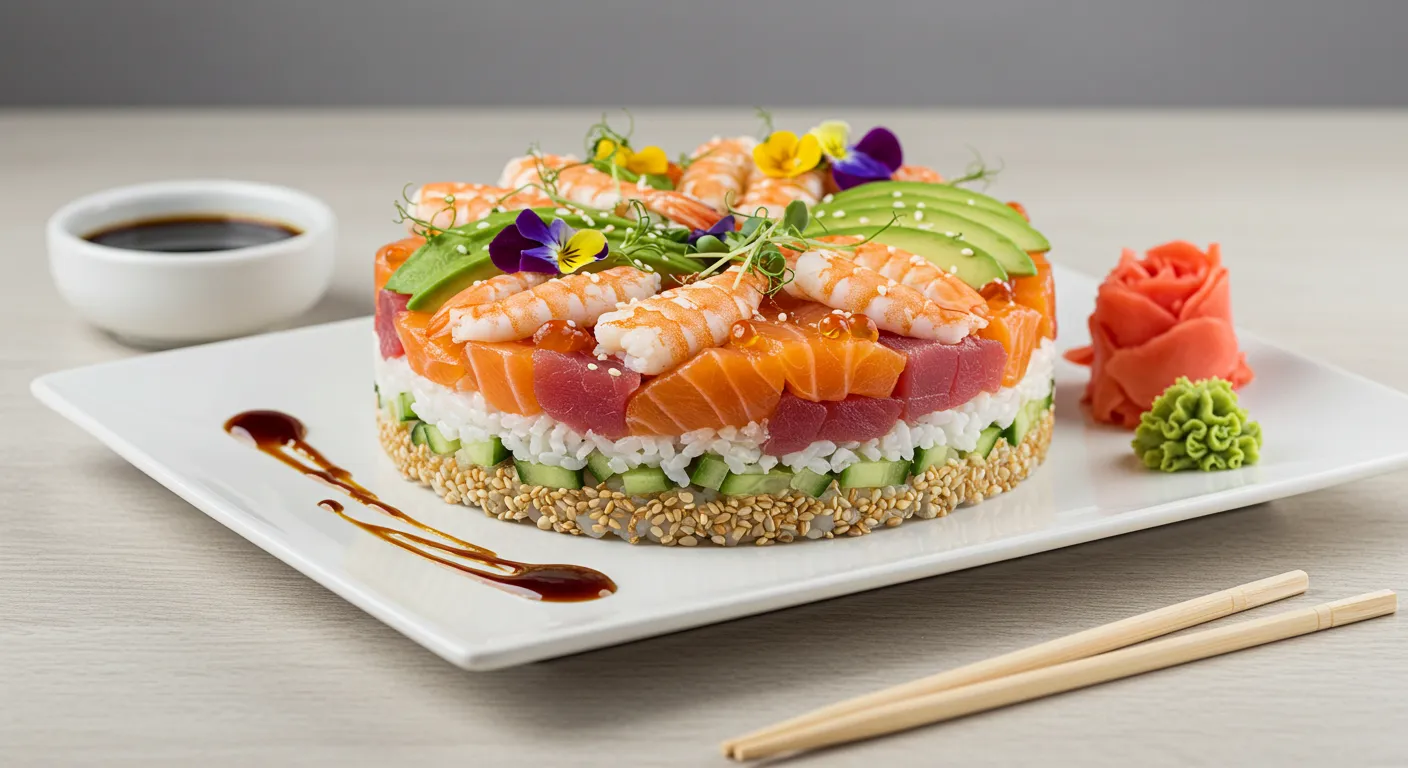
Have you ever wished sushi could be as easy to serve as a cake? Enter the Layered sushi dish—a show-stopping dish that’s just as delicious as your favorite rolls but layered into a visually stunning masterpiece. Whether you’re hosting a party, celebrating a special occasion, or simply craving a Japanese fusion food experience at home, this recipe is a guaranteed crowd-pleaser.
With seasoned sushi rice, sashimi-grade fish, creamy avocado, and vibrant toppings, every bite delivers a perfect balance of flavors and textures. The best part? You don’t need expert rolling skills—just a simple mold and a bit of creativity. Ready to build your own layered sushi cake? Let’s dive in!
Table of Contents
Why You’ll Love This Japanese cuisine
Sushi lovers, get ready for a game-changer! This layered seafood delicacy takes everything you love about sushi—fluffy seasoned sushi rice, sashimi-grade fish, creamy avocado, and vibrant toppings—and transforms it into a stunning, easy-to-make dish. Whether you’re new to sushi-making or a seasoned pro, this recipe is designed to be beginner-friendly, customizable, and absolutely delicious.
Key Benefits
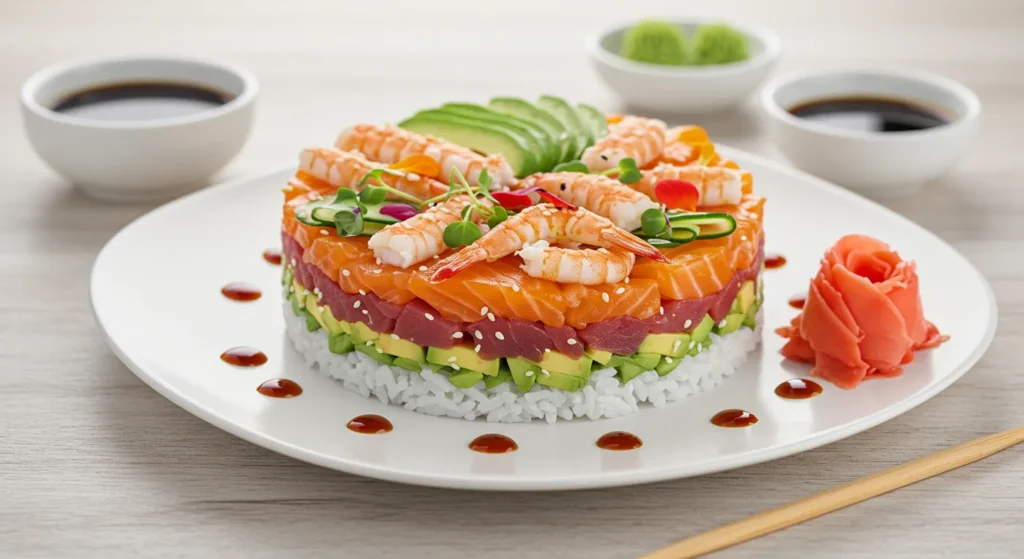
No Rolling Required – Forget the hassle of rolling individual sushi pieces! This cake-style presentation simplifies the process while keeping the flavors authentic.
Perfect for Special Occasions – Whether it’s a birthday, a sushi night with friends, or a unique appetizer for a dinner party, this dish is guaranteed to impress.
Fully Customizable – From fresh sashimi (salmon, tuna, yellowtail) to cooked options like shrimp tempura or crab, you can mix and match ingredients to suit your taste.
Visually Stunning & Instagram-Worthy – The layers of vibrant fish, crisp veggies, and flavorful sauces create a restaurant-quality presentation with minimal effort.
Healthier Alternative to Traditional Cakes – Packed with lean protein, heart-healthy omega-3s, and nutrient-rich veggies, this sushi cake is as nourishing as it is delicious.
With a few simple techniques and fresh ingredients, you can craft a sushi masterpiece that’s both fun to make and even more delightful to eat. Ready to get started? Let’s gather everything you need!
Ingredients
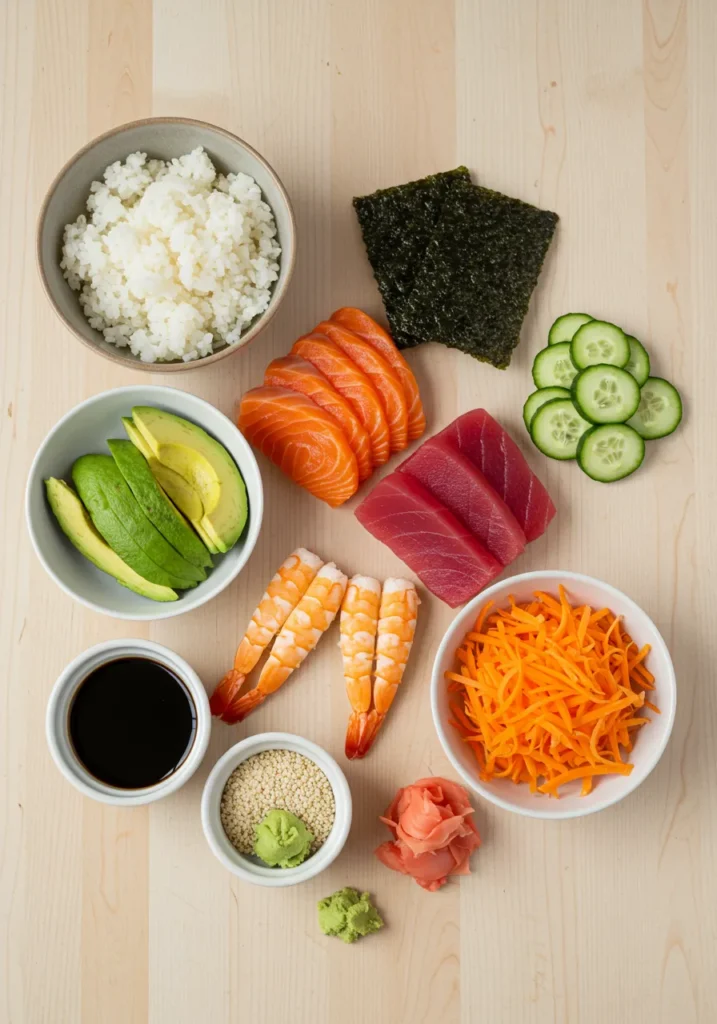
Before you dive into making your japanese cuisine, let’s make sure you have everything you need. You’ll find that this recipe doesn’t require any fancy equipment—just a few essential sushi ingredients and some creativity. Here’s the breakdown:
The Base
- Sushi rice – The foundation of every sushi dish! Look for short-grain rice, which will give you that sticky, tender texture. You’ll also need to season it with rice vinegar, sugar, and salt for that classic sushi flavor.
- Rice vinegar – Adds that signature tangy flavor to the rice.
- Sugar and salt – To balance the rice vinegar and enhance the rice’s flavor.
Fresh Toppings & Fillings
- Sashimi-grade fish – Fresh salmon, tuna, and yellowtail are the best options, but don’t hesitate to explore other options like smoked salmon or shrimp if you prefer. Just make sure it’s sushi-grade for safety.
- Avocado – Its creamy texture is perfect for adding richness and balance.
- Cucumber – Thinly sliced cucumber provides a refreshing crunch.
- Radish – A bit of heat and color; thinly slice it for extra crunch and freshness.
For Extra Flavor
- Spicy mayo – A must-have topping for that creamy, spicy kick. It’s a simple blend of mayo and Sriracha, but you can adjust the heat level to your liking.
- Tobiko (fish roe) – This adds a nice pop of color and texture.
- Sesame seeds – Sprinkle some on top for a delicate crunch and a little extra flavor.
Optional Garnishes
- Scallions – Thinly sliced for that mild onion flavor.
- Microgreens – For a fresh, decorative touch.
- Soy sauce – Serve alongside for dipping, or drizzle it on top for an added umami boost.
These ingredients come together to create a stunning seafood delicacy that’s bursting with flavor. Remember, the beauty of sushi cake is that it’s customizable! Feel free to swap out ingredients to suit your taste, dietary preferences, or what’s available in your area. Let’s get cooking!
Instructions
Now that you have your ingredients prepped and ready, it’s time to assemble your sushi cake! Don’t worry, it’s easier than it looks. I’ll guide you through each step, and soon you’ll have a gorgeous sushi cake to enjoy.
Step 1: Prepare the Sushi Rice
- Start by cooking your sushi rice according to the package instructions. Make sure it’s slightly sticky but not too wet.
- Once the rice is done, transfer it to a large bowl and gently mix in the rice vinegar, sugar, and salt while it’s still warm. This will give your rice that signature sushi flavor. Let the rice cool to room temperature.
Step 2: Assemble the Layers
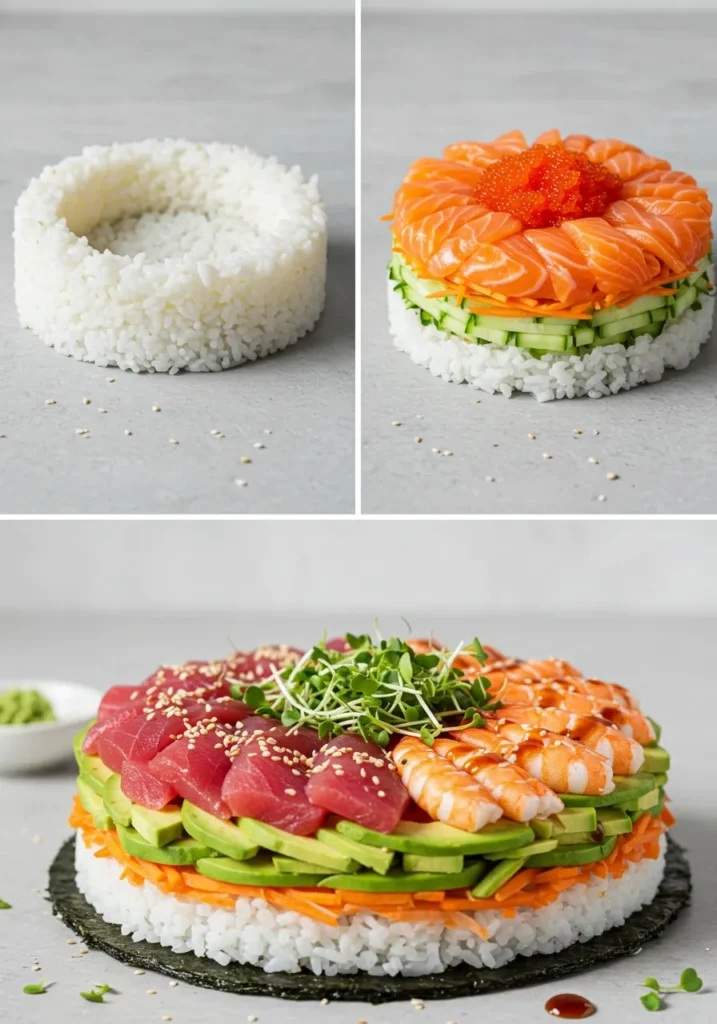
- Base Layer: Begin by layering your sushi rice into the bottom of a round cake pan (about 8-10 inches). Press the rice down gently with a spoon to create a firm, even base.
- Second Layer (Fish/Vegetables): Add your fish or vegetable layer. This could be sliced salmon, tuna, or avocado for a vibrant contrast. You can also get creative here by adding some cucumber or mango for extra texture and flavor.
- Third Layer (Additional Ingredients): Next, layer your pickled ginger, seaweed, or any other ingredients you’d like to include. You could even add a sprinkle of sesame seeds for a little extra crunch.
Step 3: Press and Set
- Once all your layers are in the pan, use the back of a spoon to gently press everything down, helping the layers hold together.
- Allow the cake to sit in the fridge for about 30 minutes. This will help the layers set and make it easier to slice later.
Step 4: Garnish and Serve
- After the cake has chilled, carefully remove it from the pan and transfer it to a serving plate.
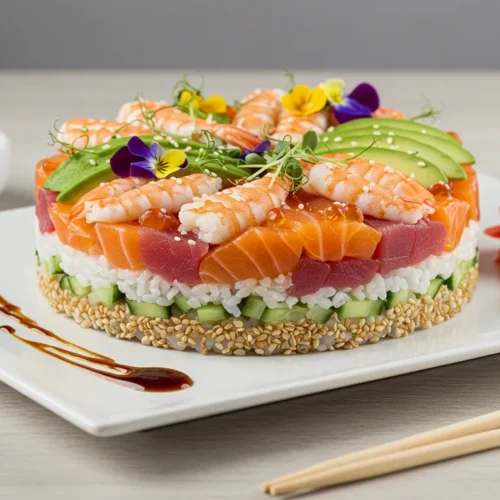
- Now, it’s time to add the finishing touches! Top the cake with more avocado, fish, microgreens, or a drizzle of spicy mayo for added flavor and presentation.
- Garnish with sesame seeds, coriander, or even a few edible flowers for that final wow factor!
Step 5: Slice and Enjoy
- To slice your Japanese cuisine, use a sharp knife and make gentle cuts to avoid smooshing the layers. Serve each slice with a small bowl of soy sauce for dipping, and enjoy!
That’s it! You’ve just created a beautiful, delicious sushi cake that’s sure to impress. Enjoy the flavors, and don’t forget to get creative with your toppings!
Pro Tips and Variations
Now that you’ve learned the basics of assembling your sushi cake, let’s talk about some pro tips and creative variations to take it to the next level. Whether you’re aiming for a unique twist or looking to perfect the traditional version, these tips will help you master the art of sushi cakes.
1. Pro Tips for a Flawless Seafood delicacy
- Rice Consistency: The key to a successful seafood delicacy is perfectly seasoned rice. Make sure your sushi rice is slightly sticky but not mushy. This ensures that the layers will stay together and hold their shape. If the rice is too dry, it might fall apart when you slice the cake.
- Cool the Rice: Let the seasoned rice cool down to room temperature before using it. This prevents it from becoming too sticky and makes layering easier.
- Use Fresh Ingredients: The freshness of your ingredients is crucial, especially when working with sashimi-grade fish. Always check your local fish market or grocery store for the freshest fish possible to ensure the best flavor and texture.
- Press Lightly: When pressing down the rice layers, don’t overdo it. You want them to stick together but still maintain some lightness. Gently press the rice down to avoid compressing it too much.
2. Creative Variations
- Go Vegan: You can easily make a vegan version of this sushi cake! Instead of sashimi or seafood, opt for thinly sliced avocado, cucumber, pickled vegetables, or tofu as your main ingredients. Topped with tobiko or sesame seeds, it’s just as delicious and satisfying.
- Try New Fillings: Experiment with smoked salmon for a richer flavor, or even add spicy tuna for a little kick. Shrimp tempura can be a fun addition if you want a crunchy texture in your sushi cake. Don’t be afraid to mix in other ingredients like mango, pineapple, or cream cheese for a unique twist!
- Sweet and Savory: For a more adventurous flavor profile, add a layer of eel sauce or drizzle some honey soy glaze on top. The sweet and savory combo can elevate the flavors and add a touch of complexity.
- Layered Designs: For a visually striking sushi cake, try creating different designs with the toppings. Think about adding a checkerboard pattern with alternating layers of fish and veggies, or going for an ombre effect with different colored ingredients like mango or radish.
3. Serving Tips
- Chill Before Slicing: After assembling your sushi cake, refrigerate it for about 30 minutes. This helps the flavors meld together and makes the cake easier to slice into perfect wedges.
- Pair with Sides: Serve your sushi cake with a side of miso soup or a seaweed salad to make it a complete meal. For extra flavor, offer some soy sauce and wasabi on the side for dipping.
- Make it a Party Dish: Sushi cakes are perfect for gatherings. Try serving them on a large platter or cutting the cake into mini-sized individual portions for easy sharing.
These tips and variations will help you create a sushi cake that’s not only beautiful but also bursting with flavors. Whether you stick with the classic version or get creative with your ingredients, you’ll have a dish that will impress every guest at the table!
Serving Suggestions
Once your Japanese cuisine is ready to be served, you’ll want to present it in a way that highlights its beauty and deliciousness. Here are some serving suggestions to elevate your sushi cake experience and ensure it’s a showstopper on any table.
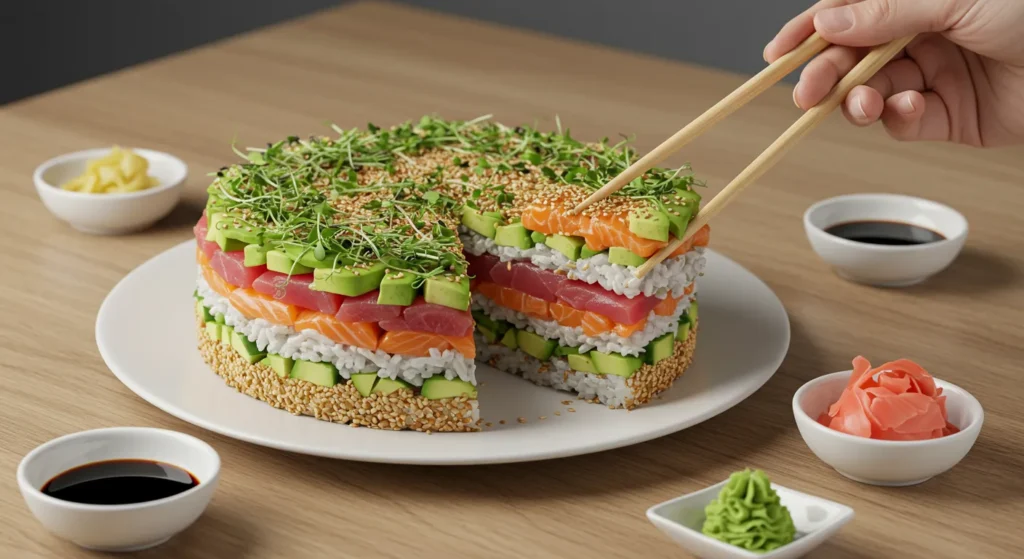
1. Garnishing for Impact
- Edible Flowers: For a visually stunning touch, garnish your sushi cake with edible flowers like nasturtiums or orchids. These flowers can add a pop of color and a delicate elegance.
- Microgreens: A sprinkle of microgreens, like pea shoots or cilantro, adds a fresh burst and vibrant greenery to the cake. These greens enhance the flavor and add a bit of crunch.
- Sesame Seeds and Seaweed: Top off your cake with toasted sesame seeds or a few pieces of nori (seaweed) for texture and flavor. Crumbled nori adds a lovely salty contrast that pairs perfectly with the fresh ingredients.
2. Plating Your Sushi Cake
- Large Serving Platter: Sushi cakes are perfect for sharing. Place your cake on a large serving platter or cutting board for a rustic look. The wider surface gives guests plenty of room to cut their slices and admire the beauty of the layers.
- Individual Portions: For a more refined presentation, cut your sushi cake into individual wedges and serve them on smaller plates. You can even top each wedge with a different garnish, making every piece feel like its own mini masterpiece.
3. Pairing with Side Dishes
- Miso Soup: A warm bowl of miso soup is a perfect side dish to complement the sushi cake. Its savory, umami-rich flavor balances out the freshness of the sushi.
- Seaweed Salad: A refreshing seaweed salad is another great pairing. The crunch and lightness of the salad contrast beautifully with the rich and creamy layers of the sushi cake.
- Pickled Vegetables: Serve a side of pickled ginger or daikon radish to enhance the sushi experience. These tangy and crunchy bites provide a wonderful contrast to the creamy avocado and fatty fish.
4. Dipping Sauces and Condiments
- Soy Sauce: A small dish of soy sauce for dipping is a classic choice that adds salty depth to every bite.
- Wasabi: If you like a little heat, serve wasabi on the side for those who want an extra spicy kick.
- Spicy Mayo: A drizzle of homemade spicy mayo over the top of each slice is the perfect creamy touch to add flavor and a hint of heat.
5. Perfect for Any Occasion
- Impress Guests: Sushi cakes are a fantastic way to impress your guests at dinner parties or special events. They’re a unique dish that’s as much about presentation as it is about flavor.
- Casual Gatherings: Want something easy for a casual get-together or family meal? A sushi cake is the perfect dish to serve, and it’s a fun way to enjoy sushi without the fuss of rolling individual pieces.
By following these serving suggestions, your sushi cake will not only taste amazing but also look incredible on the table. Whether you’re serving it for a celebration or just a regular weeknight dinner, it’s sure to be a hit with everyone.
Conclusion
Creating your own sushi cake is not only a fun and creative culinary project, but it’s also a fantastic way to impress your family, friends, or guests with a deliciously beautiful dish. With just a few simple ingredients, you can transform everyday sushi into something truly extraordinary—perfect for special occasions or casual gatherings.
Why You’ll Enjoy This Recipe
- Customizable: One of the best things about sushi cake is how easily you can tailor it to your preferences. Whether you’re a fan of salmon, tuna, avocado, or even a vegan version, the possibilities are endless.
- Visually Stunning: Sushi cake is an absolute showstopper. Its layered design and colorful ingredients make it as much a work of art as a meal. Your guests won’t be able to stop admiring (and eating) it!
- Fresh and Flavorful: The combination of fresh ingredients like sashimi-grade fish, avocado, and seasoned rice gives the cake a light yet flavorful taste that’s both satisfying and refreshing.
- Simple Yet Impressive: Despite the fancy look, sushi cakes are relatively easy to assemble. Whether you’re a novice or a seasoned cook, this recipe offers plenty of opportunities for creative expression while still keeping the process accessible.
Final Thoughts
Making a sushi cake is a wonderful way to enjoy sushi in a new, fun format. Plus, it allows you to experiment with flavors, textures, and presentation styles—there’s no wrong way to build your sushi cake! So, gather your ingredients, put on your creative hat, and get ready to create a dish that’s as delicious as it is beautiful.
____________________
sushi cake
Ingredients
The Base
- Sushi rice – The foundation of every sushi dish! Look for short-grain rice which will give you that sticky, tender texture. You’ll also need to season it with rice vinegar, sugar, and salt for that classic sushi flavor.
- Rice vinegar – Adds that signature tangy flavor to the rice.
- Sugar and salt – To balance the rice vinegar and enhance the rice’s flavor.
Fresh Toppings & Fillings
- Sashimi-grade fish – Fresh salmon tuna, and yellowtail are the best options, but don’t hesitate to explore other options like smoked salmon or shrimp if you prefer. Just make sure it’s sushi-grade for safety.
- Avocado – Its creamy texture is perfect for adding richness and balance.
- Cucumber – Thinly sliced cucumber provides a refreshing crunch.
- Radish – A bit of heat and color; thinly slice it for extra crunch and freshness.
For Extra Flavor
- Spicy mayo – A must-have topping for that creamy spicy kick. It’s a simple blend of mayo and Sriracha, but you can adjust the heat level to your liking.
- Tobiko fish roe – This adds a nice pop of color and texture.
- Sesame seeds – Sprinkle some on top for a delicate crunch and a little extra flavor.
Optional Garnishes
- Scallions – Thinly sliced for that mild onion flavor.
- Microgreens – For a fresh decorative touch.
- Soy sauce – Serve alongside for dipping or drizzle it on top for an added umami boost.
Instructions
Step 1: Prepare the Sushi Rice
- Start by cooking your sushi rice according to the package instructions. Make sure it’s slightly sticky but not too wet.
- Once the rice is done, transfer it to a large bowl and gently mix in the rice vinegar, sugar, and salt while it’s still warm. This will give your rice that signature sushi flavor. Let the rice cool to room temperature.
Step 2: Assemble the Layers
- Base Layer: Begin by layering your sushi rice into the bottom of a round cake pan (about 8-10 inches). Press the rice down gently with a spoon to create a firm, even base.
- Second Layer (Fish/Vegetables): Add your fish or vegetable layer. This could be sliced salmon, tuna, or avocado for a vibrant contrast. You can also get creative here by adding some cucumber or mango for extra texture and flavor.
- Third Layer (Additional Ingredients): Next, layer your pickled ginger, seaweed, or any other ingredients you’d like to include. You could even add a sprinkle of sesame seeds for a little extra crunch.
Step 3: Press and Set
- Once all your layers are in the pan, use the back of a spoon to gently press everything down, helping the layers hold together.
- Allow the cake to sit in the fridge for about 30 minutes. This will help the layers set and make it easier to slice later.
Step 4: Garnish and Serve
- After the cake has chilled, carefully remove it from the pan and transfer it to a serving plate.
- Now, it’s time to add the finishing touches! Top the cake with more avocado, fish, microgreens, or a drizzle of spicy mayo for added flavor and presentation.
- Garnish with sesame seeds, coriander, or even a few edible flowers for that final wow factor!
Step 5: Slice and Enjoy
- To slice your sushi cake, use a sharp knife and make gentle cuts to avoid smooshing the layers. Serve each slice with a small bowl of soy sauce for dipping, and enjoy!
Notes
- Calories: 320
- Fat: 10g
- Saturated Fat: 1g
- Carbohydrates: 48g
- Fiber: 2g
- Sugars: 4g
- Protein: 8g
- Sodium: 400mg
- Cholesterol: 30mg
FAQs
1. Can I use any type of fish for the Japanese cuisine?
Absolutely! You can use any fish that you enjoy, such as salmon, tuna, or even shrimp. If you prefer something more adventurous, try eel or yellowtail. Just ensure that the fish is fresh, and if you’re using raw fish, be sure to source it from a reputable supplier.
2. Can I make a sushi cake without fish?
Yes, of course! A seafood delicacy can easily be made vegetarian or vegan. You can substitute fish with fresh vegetables like avocado, cucumber, mango, or pickled radishes. Adding tofu or tempeh can also provide some protein for a more filling dish.
3. Do I need a special cake pan to make sushi cake?
A round cake pan or a springform pan works great for assembling your seafood delicacy. If you don’t have a cake pan, you can also use a bowl or springform mold as long as it’s sturdy enough to hold the layers of sushi rice and toppings.
4. How do I make sure the sushi rice isn’t too sticky?
To avoid overly sticky rice, make sure to rinse the sushi rice well before cooking to remove excess starch. Additionally, let the rice cool slightly before mixing in the rice vinegar and seasonings. This helps achieve that perfect sushi rice texture that isn’t too gooey.
5. Can I make sushi cake in advance?
Yes, japanese cuisine can be made in advance! You can prepare it up to a day ahead and refrigerate it. Just be sure to garnish it just before serving to maintain the freshness and vibrancy of the toppings.
6. What toppings can I add to my sushi cake?
The possibilities are endless! Some popular toppings include avocado, sesame seeds, pickled ginger, wasabi, microgreens, and sriracha mayo. You can get creative and add any of your favorite sushi ingredients.
7. How do I slice the sushi cake without making a mess?
To slice your seafood delicacy cleanly, use a sharp knife and dip it in warm water between each cut. This will help prevent the rice from sticking to the knife, giving you cleaner, more precise slices.
8. Can I freeze sushi cake?
While it’s best to enjoy seafood delicacy fresh, you can freeze the rice layer for later use. However, the toppings, especially the fish and vegetables, are best fresh and not suitable for freezing. So, it’s better to prepare and assemble it the day you plan to serve it.
9. Is sushi cake gluten-free?
Yes! If you use gluten-free soy sauce and ensure your rice vinegar and other ingredients are gluten-free, this recipe can easily be enjoyed by those following a gluten-free diet.
10. How long can I store leftovers?
Sushi cake is best enjoyed fresh, but if you have leftovers, store them in an airtight container in the fridge for up to 2 days. The rice may lose some of its texture, but the flavors will still be delicious.

