Graduation day is a momentous occasion, one that deserves to be celebrated with a cake as memorable as the achievement itself. Whether you’re looking for a creative design, personalized flavors, or a fun way to mark this special milestone, a graduation cake can truly elevate the celebration. But what makes the perfect graduation cake? It’s all about combining great taste with thoughtful design that reflects the uniqueness of the graduate. From classic vanilla to decadent chocolate, there are endless possibilities to explore, and the best part? You get to make it your own! This guide will walk you through some of the most delicious and creative graduation cake ideas to help you celebrate your big day in style. Ready to dive in and bake something unforgettable? Let’s get started!
Table of Contents
Key Benefits of Choosing a Graduation Cake
When it comes to celebrating a milestone like graduation, the cake often becomes the centerpiece of the party. But a graduation cake is more than just a sweet treat—it’s a way to make the moment even more special. Here are a few key benefits to choosing a graduation cake that truly stands out:
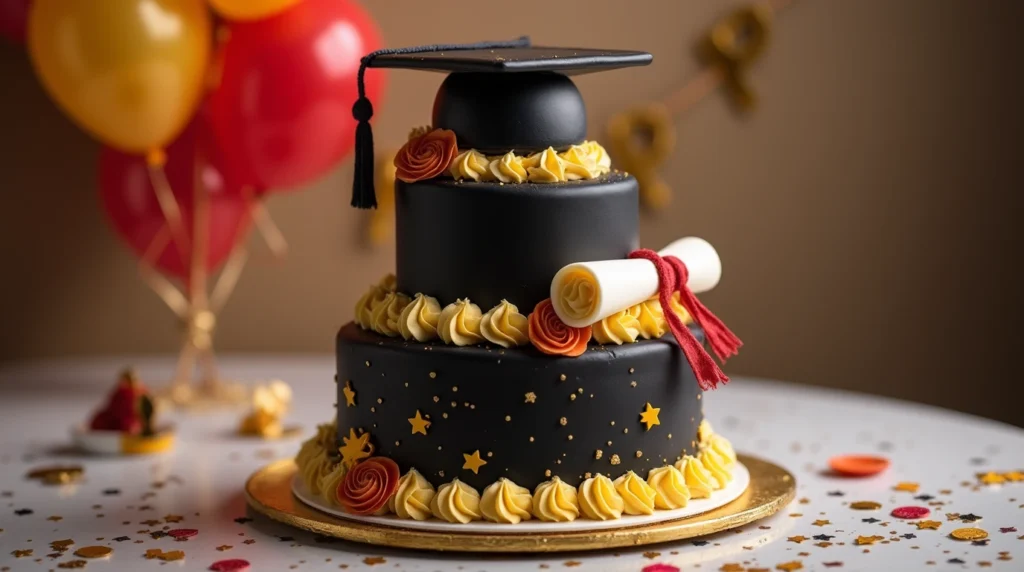
- Memorable and Personal: A well-designed graduation cake can reflect the graduate’s personality, achievements, or even school colors. This adds a personal touch that makes the cake more than just dessert—it becomes a symbol of hard work and success.
- Customizable Designs: Graduation cakes offer endless possibilities for customization. From simple yet elegant to intricate and themed designs, you can adapt the cake to fit any celebration style. Think of incorporating elements like a graduation cap, diploma, or even the school logo.
- Versatility of Flavors: Whether the graduate loves classic vanilla, rich chocolate, or something a bit more adventurous, graduation cakes can be tailored to satisfy any taste. The flavors and fillings are only limited by your imagination! You can even add a twist with special flavor combinations or fillings like salted caramel or fresh berries.
- Creating Lasting Memories: A beautiful cake becomes a visual highlight of the party, and its design often sparks conversations and memories. It’s something that can be shared and admired, creating a sense of joy and togetherness among your guests.
- Easy to Serve and Enjoy: Graduation cakes are typically designed to be easy to serve, whether you’re slicing it into classic portions or offering mini servings for individual guests. With the right decoration and portioning, everyone can enjoy a piece without the hassle of cutting large, awkward slices.
In short, a graduation cake isn’t just about what’s on the table—it’s about creating an experience, a memory, and a way to celebrate one of life’s biggest achievements. So, why settle for an ordinary cake when you can make your graduation day even sweeter with a custom creation that will leave everyone talking?
Ingredients for the Perfect Graduation Cake
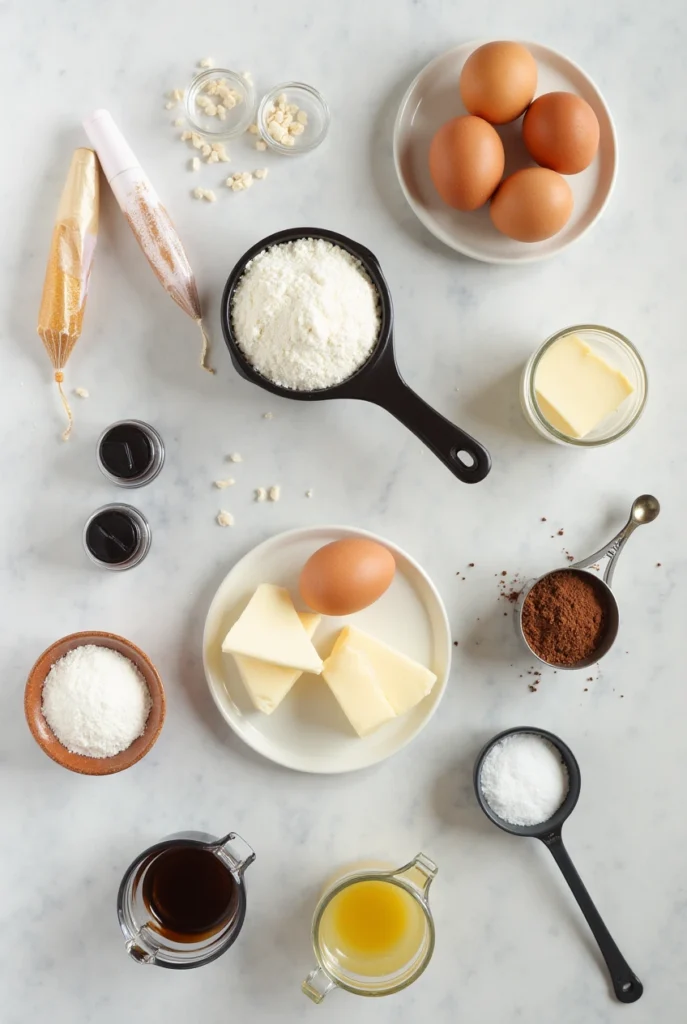
When it comes to creating a show-stopping graduation cake, the ingredients you choose play a huge role in both the flavor and texture. Whether you’re opting for a classic vanilla cake or experimenting with different fillings and flavors, these ingredients will help you craft the perfect base for your celebration. Let’s take a look at the essential components to get started:
Cake Base Ingredients:
To make a moist and flavorful cake, you’ll need the following staples:
- 2 ½ cups all-purpose flour – This gives the cake structure and a soft crumb.
- 2 cups granulated sugar – Sweetens the cake and helps it rise.
- 1 tablespoon baking powder – Ensures the cake has a light, fluffy texture.
- ½ teaspoon salt – Balances out the sweetness for a well-rounded flavor.
- 1 cup unsalted butter – Adds richness and moisture to the cake.
- 4 large eggs – These provide structure and bind the ingredients together.
- 1 cup whole milk – Creates a smooth batter for a tender cake.
- 2 teaspoons vanilla extract – The secret to adding that comforting, familiar flavor.
Flavor Variations (Optional):
You can easily customize the flavor of your cake to make it truly special:
- For a chocolate cake: Add ½ cup of cocoa powder to the dry ingredients for a rich, decadent flavor.
- For a fruity twist: Add 1 cup of fresh berries or citrus zest for a light, refreshing taste.
- For a nutty flavor: Fold in ½ cup of chopped walnuts, almonds, or pecans to bring in a crunchy texture and earthy taste.
Frosting and Decoration Ingredients:
Now, let’s talk about that irresistible frosting that will make your cake shine:
- 2 cups heavy cream – The base for a rich, smooth frosting.
- 4 cups powdered sugar – Sweetens the frosting while making it light and fluffy.
- 1 teaspoon vanilla extract – Enhances the flavor and rounds out the sweetness.
- Food coloring – Customize your frosting to match the school colors or party theme.
- Decorative elements: Consider adding edible glitter, sprinkles, or fondant decorations like graduation caps, diplomas, or the graduate’s name.
Pro Tip:
To make the cake extra impressive, consider creating a layered cake. Simply double the recipe and use multiple cake pans to stack the layers. For added texture, try alternating between different flavors or fillings, such as adding a layer of fruit preserves or a rich ganache between the cake layers.
With these ingredients in hand, you’re well on your way to creating a show-stopping graduation cake that will leave everyone talking. Ready to bake? Let’s move on to the fun part—preparing the cake!
Instructions for Baking and Assembling Your Graduation Cake
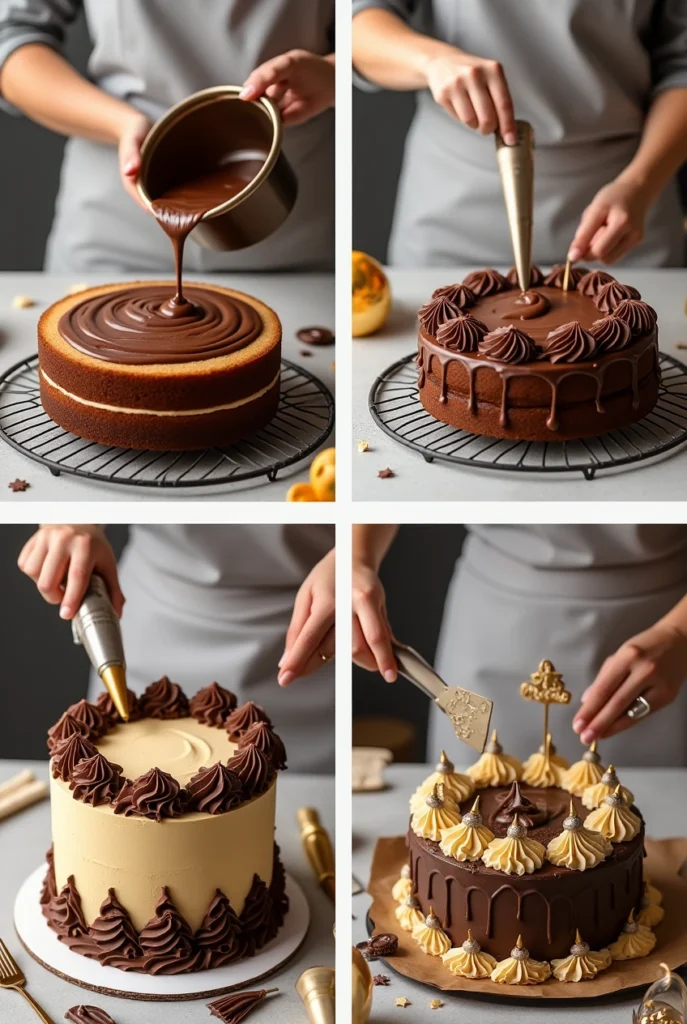
Now that you’ve got your ingredients ready, it’s time to start the fun part—baking and assembling your graduation cake! These simple steps will guide you through creating a light, fluffy cake that’s as delicious as it is beautiful. Let’s dive in!
Step 1: Preheat and Prep Your Pans
Start by preheating your oven to 350°F (175°C). This ensures your cake bakes evenly. While the oven heats up, grease and flour two 9-inch round cake pans (or use parchment paper for added security). This step will make sure the cake comes out easily once it’s done.
Step 2: Combine the Dry Ingredients
In a medium-sized bowl, whisk together your dry ingredients:
- 2 ½ cups all-purpose flour
- 1 tablespoon baking powder
- ½ teaspoon salt
This simple mixture is the backbone of your cake, creating a light and airy texture. Set it aside for now as you move on to the wet ingredients.
Step 3: Cream the Butter and Sugar
In a large mixing bowl, beat 1 cup unsalted butter and 2 cups granulated sugar until light and fluffy. Use a hand mixer or stand mixer on medium speed for about 3-5 minutes. This step incorporates air into the batter, which is key to getting that soft, tender crumb we all love.
Step 4: Add Eggs and Vanilla
Add the 4 large eggs one at a time, mixing well after each addition. This allows the eggs to fully incorporate and helps give structure to your cake. Then, stir in 2 teaspoons vanilla extract to enhance the flavor.
Step 5: Alternate Adding Dry Ingredients and Milk
Now, it’s time to mix everything together! Start by adding a third of your dry ingredients to the butter mixture, then pour in 1 cup whole milk. Alternate between adding more dry ingredients and the rest of the milk, mixing on low speed. This method helps prevent overmixing and ensures a smooth batter.
Step 6: Bake Your Cakes
Divide the batter evenly between the two cake pans, spreading it out with a spatula for an even bake. Place the pans in the oven and bake for 25-30 minutes, or until a toothpick inserted into the center of the cakes comes out clean. Each oven is different, so keep an eye on your cakes, especially toward the end!
Step 7: Cool the Cakes
Once baked, let the cakes cool in the pans for about 10 minutes. Then, transfer them to a wire rack to cool completely. Cooling is essential because if you frost the cake too soon, the frosting can melt right off. Patience is key here!
Step 8: Frost and Decorate
Once the cakes are completely cool, it’s time to add your frosting! Start by applying a thin layer of frosting over the entire cake to lock in any crumbs (this is called a crumb coat). Place the cake in the fridge for about 15-20 minutes to set the crumb coat.
After the crumb coat has set, spread a thicker layer of frosting over the top and sides of the cake. You can use a spatula for a smooth finish or a piping bag for a more decorative effect. This is where you can get creative—decorate with edible glitter, fondant graduation caps, or even school colors to match the theme of the celebration.
Pro Tip:
For a flawless finish, try dipping your spatula in warm water while frosting the cake. This will help you achieve a smooth, professional look without tearing the frosting.
Now, your graduation cake is ready to be admired and enjoyed! Whether you stick with a classic design or go all out with personalized decorations, this cake will be the perfect centerpiece for your celebration. Happy baking!
Pro Tips and Variations for Your Graduation Cake
When it comes to baking a graduation cake, the fun doesn’t stop at the basic recipe! This is your chance to get creative with flavors, decorations, and designs that will make your cake truly unique. Here are some pro tips and fun variations to take your graduation cake to the next level.
Pro Tips for a Flawless Cake:
- Room Temperature Ingredients: Make sure your butter, eggs, and milk are at room temperature before you start baking. This helps the ingredients blend smoothly, creating a better texture for your cake.
- Don’t Overmix the Batter: When combining your wet and dry ingredients, mix until just incorporated. Overmixing can lead to a dense, heavy cake. Less is more when it comes to stirring!
- Use Cake Strips for Even Baking: If you want perfectly even cakes (no domed tops), try using cake strips. These inexpensive fabric strips wrap around your cake pans and help distribute the heat more evenly, resulting in a flat, even bake every time.
- Chill Your Frosting: If you’re using buttercream frosting, give it a 20-minute chill in the fridge before you spread it on your cake. This will make it easier to work with, especially if you’re piping intricate designs.
Fun Variations to Personalize Your Graduation Cake:
- Flavor Variations: Why stick with just one flavor when you can mix things up? Try alternating layers of different flavors to create a fun and surprising twist. For example:
- Classic Vanilla and Chocolate: A layered cake with both vanilla and chocolate flavors is a crowd-pleaser.
- Lemon and Blueberry: For a fresh, tangy twist, combine a lemon cake with blueberry filling or frosting.
- Carrot Cake: Add a spiced twist to your graduation cake with a moist carrot cake layered with cream cheese frosting.
- Different Frosting Types: If buttercream isn’t your thing, don’t worry! There are plenty of other frosting options:
- Whipped Cream: Light and airy, whipped cream frosting adds a fluffy texture and is perfect for a lighter, less sweet option.
- Cream Cheese Frosting: Rich and tangy, this frosting pairs wonderfully with carrot cake or chocolate cake.
- Ganache: For a glossy, elegant finish, try pouring a smooth chocolate ganache over your cake. It’ll create a luxurious look and taste.
- Themed Decorations: Personalizing your graduation cake is an easy way to make it more meaningful. Try these fun ideas:
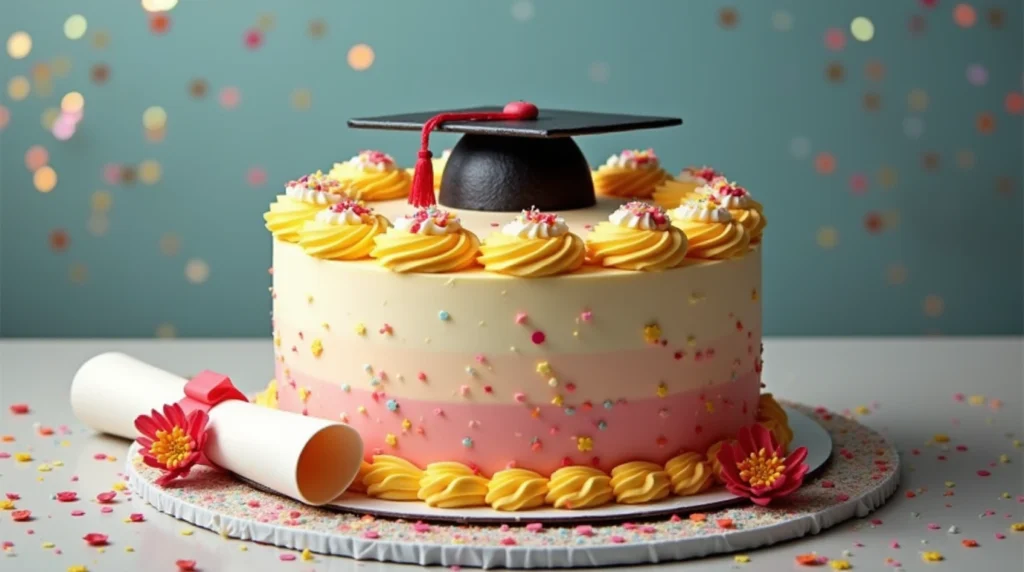
- Graduation Cap and Diploma: Create a fondant graduation cap and diploma, and place them on top of your cake for an extra celebratory touch.
- School Colors: Use food coloring to tint your frosting in your graduate’s school colors. You can also add colored sprinkles or edible glitter for a pop of festive flair.
- Personalized Messages: If you’re feeling extra creative, use fondant or royal icing to write a personalized message like “Congrats, [Name]!” or “Class of 2025.”
Pro Tip for Decorating:
If you’re decorating with fondant, roll it out on a powdered sugar-dusted surface to prevent it from sticking. To make smooth, clean edges, use a pizza cutter or sharp knife to trim any excess fondant from the edges of the cake.
With these pro tips and creative variations, you’ll have a graduation cake that’s as beautiful as it is delicious! Whether you’re experimenting with flavors or crafting a detailed design, these small tweaks will make your cake stand out and leave everyone raving. Enjoy the process, and don’t forget to savor every bite of your success!
Serving Suggestions for Your Graduation Cake
Now that you’ve baked, frosted, and decorated your graduation cake, it’s time to think about how to serve it in style. A beautiful cake deserves to be presented in a way that enhances the experience for your guests, making your celebration even more memorable. Here are some creative and practical serving suggestions to elevate your graduation cake:
1. Display the Cake with Flair:
Before cutting into your cake, consider how you’ll display it. A well-presented cake can set the tone for your celebration. Here are a few ideas:
- Cake Stand or Pedestal: Elevate your cake on a decorative cake stand or pedestal to make it the focal point of the table.
- Themed Cake Topper: Add a fun graduation-themed cake topper, like a miniature graduation cap or a fondant “Class of 2025” message. This adds a personal touch and makes for great photos.
- Floral Accents: Fresh flowers, like roses or baby’s breath, can add a sophisticated touch to your cake’s presentation. Just be sure to use non-toxic flowers if they’re going to touch the cake directly.
2. Slice with Precision:
To make sure your slices are clean and uniform, use a sharp serrated knife. Here are some tips to keep your cake looking neat:
- Warm Knife: Dip your knife in warm water before slicing, and wipe it clean between cuts. This will help you get clean, smooth slices and avoid pulling up frosting with each cut.
- Smaller Portions: Graduation cakes are often big, so cut the cake into smaller portions to ensure everyone gets a piece. For a large celebration, you can even consider serving mini cake slices or cupcakes alongside the main cake for variety.
3. Pairing Your Cake with Drinks:
Pairing your cake with the right drinks can enhance the flavor and create a memorable treat for your guests. Here are a few drink ideas to serve alongside your graduation cake:
- Coffee or Tea: A light, flavorful coffee or tea pairs wonderfully with most cake flavors, especially if you’ve opted for a richer frosting like cream cheese or chocolate ganache.
- Milk: For a classic combination, serve chilled milk with your cake. It’s a nostalgic pairing that works especially well with vanilla or chocolate cakes.
- Sparkling Water or Lemonade: If you’re looking for something more refreshing, sparkling water or lemonade is a great option, especially if you’ve added fruity flavors to your cake.
4. Serving Suggestions for Leftovers:
If you have leftover cake (which we hope you do!), storing and serving it can be just as enjoyable as the first slice.
- Wrap and Refrigerate: Store leftover cake slices in an airtight container in the fridge for up to 3 days. To keep the cake fresh, you can also cover it with plastic wrap or foil.
- Cake Parfaits: Transform leftover cake into cake parfaits! Layer small pieces of cake with whipped cream, fruit, or pudding in individual cups. It’s a fun and easy way to reuse leftovers for a second round of dessert.
- Freeze for Later: If you want to save some cake for a special occasion down the road, you can freeze slices. Wrap them tightly in plastic wrap and foil, and freeze for up to 3 months. Just thaw at room temperature when you’re ready to enjoy!
Pro Tip:
If you’re serving the cake outdoors or during a hot season, consider placing the cake on a cake stand with a dome lid to keep it fresh and protected from the elements.
With these serving suggestions, your graduation cake will be the perfect centerpiece for your celebration. Whether you’re creating a stunning display, pairing it with drinks, or serving leftovers in a creative way, these ideas will help make your graduation day even more special. Enjoy the cake, the company, and, of course, the sweet memories you’re creating!
Conclusion: Celebrate in Style with a Perfect Graduation Cake
Congratulations—your graduation cake is ready to be the star of the show! Whether you’re celebrating a high school, college, or any other milestone, this cake is more than just dessert; it’s a delicious way to mark a huge achievement. From the rich flavor of the cake layers to the custom decorations, your graduation cake is sure to wow your guests and leave everyone with sweet memories.
Why This Cake is the Perfect Choice:
This recipe is designed to be flexible, allowing you to tailor the flavors, decorations, and even the cake’s size to your specific celebration needs. Whether you’re keeping it classic with a simple vanilla cake or adding some fun variations like chocolate or lemon, this cake is sure to satisfy every palate. Plus, the decorative options—from fondant toppers to creative frosting designs—let you personalize it to match the school colors, the graduate’s personality, or even the party theme.
A Cake That’s More Than Just a Dessert:
A graduation cake isn’t just about the flavors and decorations—it’s about creating a meaningful experience. It’s about sharing this moment with friends and family and marking a pivotal moment in life with something sweet. This cake can become the centerpiece of your celebration, sparking conversations and drawing smiles as everyone gathers around to share in the joy of your accomplishment.
Final Thoughts:
Baking a graduation cake doesn’t have to be intimidating! With these simple instructions, tips, and variations, you can create a stunning, delicious cake that will be the talk of your graduation party. Don’t be afraid to experiment with different flavors and decorations to make the cake truly yours. Most importantly, enjoy the process, because baking a cake for such a special occasion is a memory in itself.
So, roll up your sleeves, put on your favorite playlist, and celebrate this huge achievement with a cake that’s as sweet and memorable as your hard-earned success!
With this graduation cake, the possibilities are endless, and the joy of sharing it with loved ones will last long after the last slice is gone. Happy baking and congrats again on your big day!
________________________________

Graduation Cakes
Ingredients
Cake Base Ingredients:
- To make a moist and flavorful cake you’ll need the following staples:
- 2 ½ cups all-purpose flour – This gives the cake structure and a soft crumb.
- 2 cups granulated sugar – Sweetens the cake and helps it rise.
- 1 tablespoon baking powder – Ensures the cake has a light fluffy texture.
- ½ teaspoon salt – Balances out the sweetness for a well-rounded flavor.
- 1 cup unsalted butter – Adds richness and moisture to the cake.
- 4 large eggs – These provide structure and bind the ingredients together.
- 1 cup whole milk – Creates a smooth batter for a tender cake.
- 2 teaspoons vanilla extract – The secret to adding that comforting familiar flavor.
Flavor Variations (Optional):
- You can easily customize the flavor of your cake to make it truly special:
- For a chocolate cake: Add ½ cup of cocoa powder to the dry ingredients for a rich decadent flavor.
- For a fruity twist: Add 1 cup of fresh berries or citrus zest for a light refreshing taste.
- For a nutty flavor: Fold in ½ cup of chopped walnuts almonds, or pecans to bring in a crunchy texture and earthy taste.
Frosting and Decoration Ingredients:
- Now let’s talk about that irresistible frosting that will make your cake shine:
- 2 cups heavy cream – The base for a rich smooth frosting.
- 4 cups powdered sugar – Sweetens the frosting while making it light and fluffy.
- 1 teaspoon vanilla extract – Enhances the flavor and rounds out the sweetness.
- Food coloring – Customize your frosting to match the school colors or party theme.
- Decorative elements: Consider adding edible glitter sprinkles, or fondant decorations like graduation caps, diplomas, or the graduate’s name.
Instructions
Step 1: Preheat and Prep Your Pans
- Start by preheating your oven to 350°F (175°C). This ensures your cake bakes evenly. While the oven heats up, grease and flour two 9-inch round cake pans (or use parchment paper for added security). This step will make sure the cake comes out easily once it’s done.
Step 2: Combine the Dry Ingredients
- In a medium-sized bowl, whisk together your dry ingredients:
- 2 ½ cups all-purpose flour
- 1 tablespoon baking powder
- ½ teaspoon salt
- This simple mixture is the backbone of your cake, creating a light and airy texture. Set it aside for now as you move on to the wet ingredients.
Step 3: Cream the Butter and Sugar
- In a large mixing bowl, beat 1 cup unsalted butter and 2 cups granulated sugar until light and fluffy. Use a hand mixer or stand mixer on medium speed for about 3-5 minutes. This step incorporates air into the batter, which is key to getting that soft, tender crumb we all love.
Step 4: Add Eggs and Vanilla
- Add the 4 large eggs one at a time, mixing well after each addition. This allows the eggs to fully incorporate and helps give structure to your cake. Then, stir in 2 teaspoons vanilla extract to enhance the flavor.
Step 5: Alternate Adding Dry Ingredients and Milk
- Now, it’s time to mix everything together! Start by adding a third of your dry ingredients to the butter mixture, then pour in 1 cup whole milk. Alternate between adding more dry ingredients and the rest of the milk, mixing on low speed. This method helps prevent overmixing and ensures a smooth batter.
Step 6: Bake Your Cakes
- Divide the batter evenly between the two cake pans, spreading it out with a spatula for an even bake. Place the pans in the oven and bake for 25-30 minutes, or until a toothpick inserted into the center of the cakes comes out clean. Each oven is different, so keep an eye on your cakes, especially toward the end!
Step 7: Cool the Cakes
- Once baked, let the cakes cool in the pans for about 10 minutes. Then, transfer them to a wire rack to cool completely. Cooling is essential because if you frost the cake too soon, the frosting can melt right off. Patience is key here!
Step 8: Frost and Decorate
- Once the cakes are completely cool, it’s time to add your frosting! Start by applying a thin layer of frosting over the entire cake to lock in any crumbs (this is called a crumb coat). Place the cake in the fridge for about 15-20 minutes to set the crumb coat.
- After the crumb coat has set, spread a thicker layer of frosting over the top and sides of the cake. You can use a spatula for a smooth finish or a piping bag for a more decorative effect. This is where you can get creative—decorate with edible glitter, fondant graduation caps, or even school colors to match the theme of the celebration.
Notes
- Calories: 400
- Fat: 22g
- Saturated Fat: 8g
- Carbohydrates: 47g
- Fiber: 1g
- Sugars: 35g
- Protein: 4g
- Sodium: 200mg
- Cholesterol: 55mg
- Vitamin A: 6% of daily value
- Calcium: 2% of daily value
- Iron: 6% of daily value
FAQs
Baking a graduation cake is a special way to celebrate, and you might have a few questions as you go along. Don’t worry, I’ve got you covered! Here are some of the most common questions I get when it comes to making the perfect graduation cake, along with helpful answers to ensure your celebration is a hit.
1. How do I make my cake extra moist?
Moisture is key to a delicious cake, and there are a few simple tricks to ensure your cake is as moist as possible:
Buttermilk or Sour Cream: These ingredients help keep your cake tender and moist. If you’re using buttermilk, it will also give a slight tang that pairs wonderfully with sweet frostings.
Don’t Overbake: Check the cake a few minutes before the suggested baking time is up. A toothpick inserted should come out clean or with just a few moist crumbs.
Add Simple Syrup: Brushing the cake layers with a light syrup (made with equal parts sugar and water) helps lock in moisture without making the cake overly sweet.
2. Can I bake the cake in advance?
Absolutely! You can bake your cake 2-3 days ahead of time. Here’s how:
After baking, allow the layers to cool completely. Then, wrap each layer in plastic wrap and store them in an airtight container.
If you’re planning even further ahead, freeze the layers. Wrap them tightly in plastic and foil and freeze for up to 3 months. When you’re ready to decorate, just thaw the cakes in the fridge overnight.
3. How should I store leftover cake?
If there’s any leftover cake (lucky you!), here’s how to keep it fresh:
Room Temperature: For up to 2 days, you can store leftover cake in an airtight container at room temperature.
Refrigerate for Longer Freshness: If you’re storing it for more than a couple of days, keep it in the fridge to maintain its freshness for up to 5 days.
Freezing Leftovers: Wrap slices in plastic wrap and then foil, and freeze them for up to 3 months. Just thaw at room temperature when you’re ready for another slice.
4. Can I make a gluten-free graduation cake?
Yes, you can! There are many gluten-free flour blends available that can be substituted 1:1 for all-purpose flour in this recipe. Just make sure your blend contains a binder like xanthan gum to keep the cake’s texture intact.
If you’re using a store-bought gluten-free cake mix, that works too! Just make sure to check the ingredients for any hidden gluten.
Don’t forget to use a gluten-free frosting as well, especially if you’re using pre-made or boxed options.
5. What’s the best frosting for a graduation cake?
The frosting is just as important as the cake itself, and you have lots of delicious options:
Buttercream Frosting: Classic and easy to work with, buttercream is perfect for both frosting and piping. You can make it flavored with vanilla, almond, or even citrus zest to match your cake.
Cream Cheese Frosting: For a tangy contrast, cream cheese frosting is ideal, especially if you’re making a spiced or carrot cake.
Whipped Cream: If you’re after something lighter, a simple whipped cream frosting is fresh and not too sweet, but be mindful that it needs refrigeration.
Ganache: If you want to take things to the next level, a smooth chocolate ganache will make your cake rich and decadent.
6. How can I decorate my cake for a graduation theme?
Making your cake fit the occasion is half the fun! Here are some decoration ideas to make your graduation cake truly stand out:
Graduation Cap Toppers: Craft a simple fondant or chocolate graduation cap to place on top of your cake for a classy and recognizable look.
School Colors: Use the graduate’s school colors for the frosting or sprinkles to add a personal touch. You can also use colored fondant or edible glitter to tie everything together.
Mini Diplomas: Mini fondant diplomas or scrolls can be a charming addition to your cake’s decoration. They’re simple to make and add a whimsical touch to the overall theme.
Personalized Messages: You can pipe “Congrats [Name]!” or “Class of 2025” on the cake, either in bold letters or with a fun, decorative font.
7. Can I use store-bought frosting?
Of course! Store-bought frosting is a great time-saver and can work beautifully with your cake. To elevate it:
Whip It Up: Give it a quick mix with an electric hand mixer to make it lighter and fluffier.
Flavor It: Add a little vanilla or almond extract to enhance the flavor, or stir in some cocoa powder for a chocolate twist.
Color It: If you’re going for a particular theme, you can easily tint store-bought frosting with gel food coloring to match the occasion.
Pro Tip:
If you’re making a multi-layered cake, consider chilling the layers for a bit before assembling. This helps them stay sturdy, preventing any sliding or messy frosting. A chilled cake is also much easier to frost and decorate!
Now that you’ve got all the answers to your questions, you’re ready to bake and decorate a stunning graduation cake! Whether you’re opting for a simple design or going all out with themed decorations, the key is to have fun and celebrate the moment. Happy baking and congrats again!

