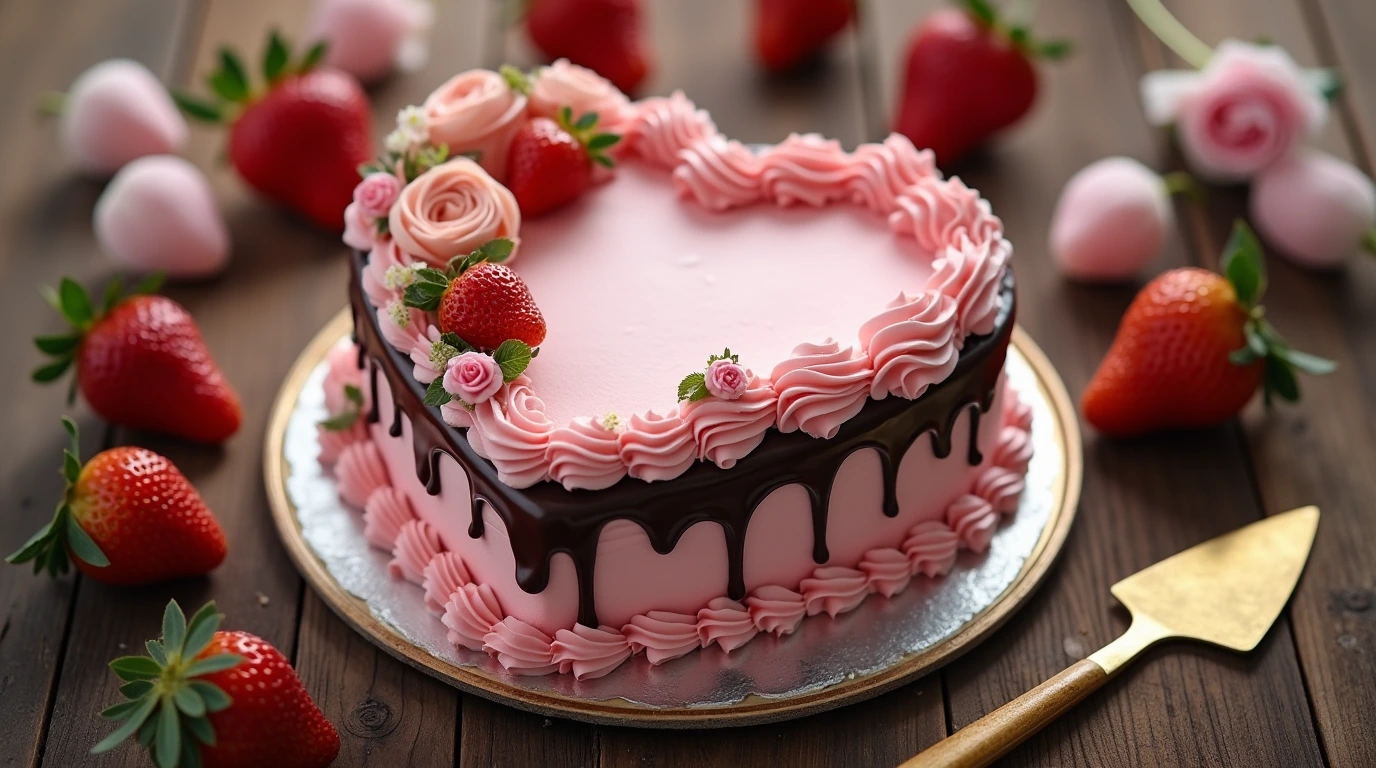
Have you ever wanted to create a dessert that not only tastes incredible but also looks like a work of art? A heart cake is the perfect way to add a touch of creativity and sweetness to any special day, whether it’s a romantic Valentine’s celebration, an anniversary, or just a way to show someone you care. With its charming design and endless possibilities for flavors and decorations, this cake is as versatile as it is stunning. Don’t worry if you’re new to baking—this recipe will guide you step-by-step, so you can craft a heartfelt masterpiece right in your kitchen. Ready to bake your way to someone’s heart? Let’s get started!
Table of Contents
Key Benefits of a Heart Cake
A heart cake isn’t just a dessert; it’s an experience that brings joy, creativity, and sweetness to your special moments. Here’s why it’s the perfect choice for any occasion:
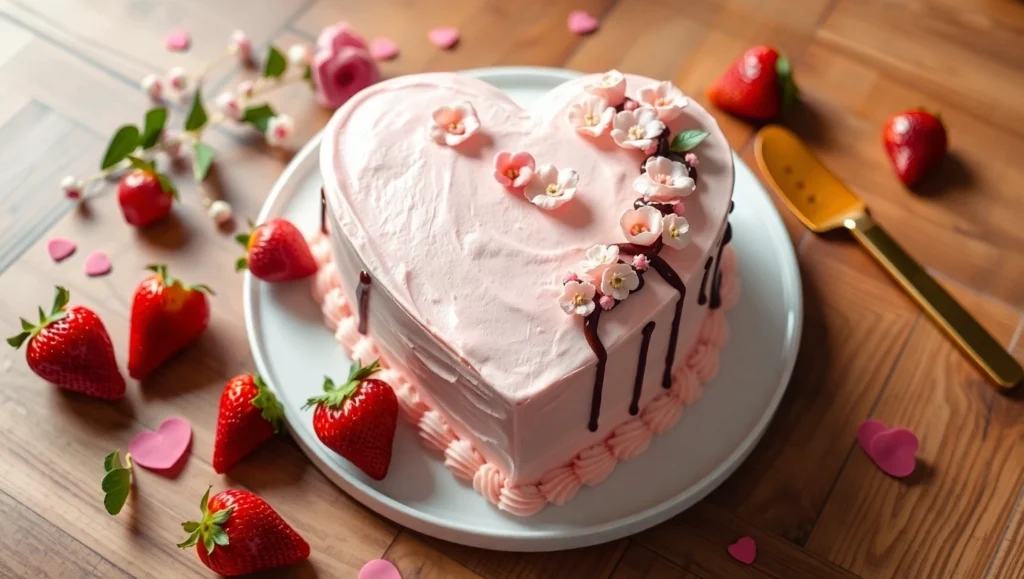
- Perfect for Celebrations: Whether you’re baking for Valentine’s Day, an anniversary, or a birthday, a heart-shaped cake is an instant way to show your love and make the day even more memorable. Its design alone speaks volumes, making it a standout centerpiece at any event.
- Customizable Flavors & Designs: One of the best things about making your own heart cake is the flexibility it offers. You can choose from classic flavors like chocolate, vanilla, or red velvet, or even get creative with fun twists like strawberry, lemon, or even a decadent layered mousse. And the design options? Endless! From simple frosted hearts to intricate piping and decorative flowers, you’re only limited by your imagination.
- Easy to Personalize: You can make each heart cake truly your own. Add a personal touch with a custom message, a favorite frosting flavor, or even edible glitter for a dash of sparkle. This is a cake that says, “I put thought into this just for you.”
- Fun to Make Together: Baking this cake can be a wonderful bonding activity. Whether you’re baking with a partner, friends, or kids, the process is as much fun as the finished product. Plus, it’s an excellent opportunity to teach others a few baking tips!
- Budget-Friendly: You don’t need fancy equipment or expensive ingredients to make this cake shine. With basic pantry staples and a few simple tools (think heart-shaped cake pans or cookie cutters), you can craft a show-stopping dessert without breaking the bank.
- Great for Beginners: Don’t worry if you’re new to baking. This heart cake recipe is simple enough for beginners, with step-by-step instructions that will guide you through the process. You’ll be amazed at what you can create!
Baking a heart cake isn’t just about creating a dessert—it’s about spreading joy and making memories. So, whether you’re celebrating a big event or simply want to surprise someone with a sweet gesture, this cake is sure to make an impact. Ready to get baking? Let’s dive into the ingredients next!
Ingredients for Your Heart Cake
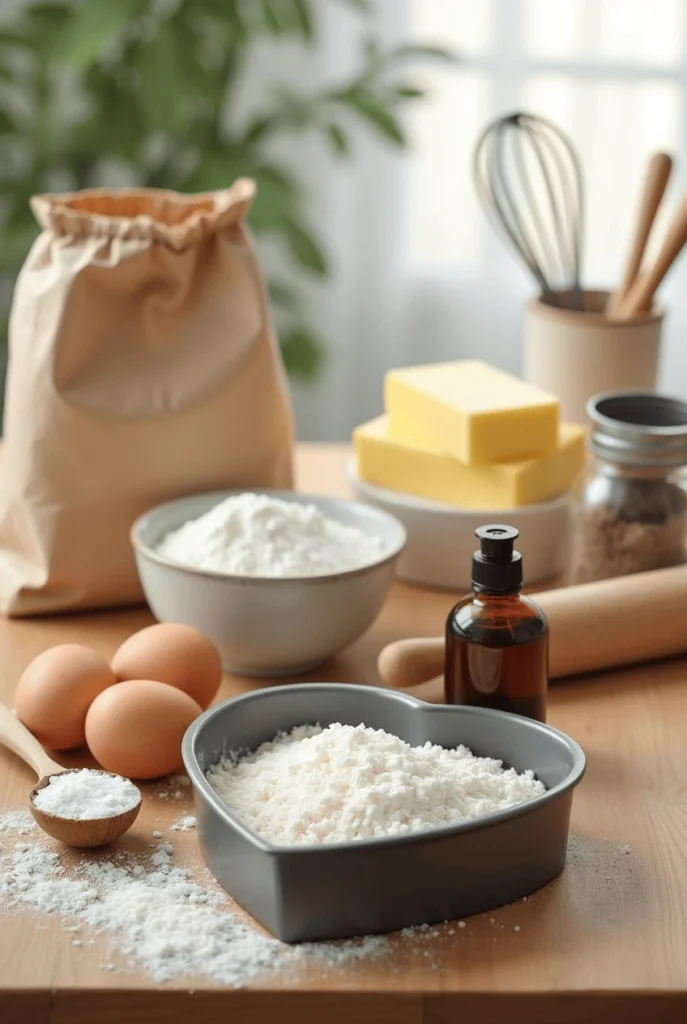
Now that you’re excited about creating your heart-shaped masterpiece, let’s talk about the ingredients you’ll need. Fortunately, this recipe calls for basic pantry staples, which means you don’t have to make a special trip to the store. Here’s what you’ll need to get started:
For the Cake Base:
- 2 ½ cups all-purpose flour: This is the foundation of your cake, giving it structure and lightness.
- 2 tsp baking powder: To help the cake rise and achieve that perfect fluffy texture.
- 1 cup unsalted butter (softened): This adds richness and moisture to the cake.
- 1 ½ cups granulated sugar: Sweetness is key! This balances out the richness of the butter.
- 4 large eggs: Eggs help bind the ingredients together and provide structure.
- 1 tsp vanilla extract: A must for that warm, inviting flavor.
- 1 cup whole milk: Adds moisture and helps achieve the perfect cake crumb.
For the Frosting:
- 1 cup unsalted butter (softened): Creamy butter forms the base of a rich, smooth frosting.
- 4 cups powdered sugar: This gives the frosting that dreamy, fluffy texture.
- 2-3 tbsp heavy cream: Helps to achieve the right consistency for spreading and piping.
- 1 tsp vanilla extract: For a sweet, aromatic flavor.
- Food coloring (optional): Want a vibrant red, pink, or pastel-colored frosting? This is your chance to get creative!
For Decoration (Optional):
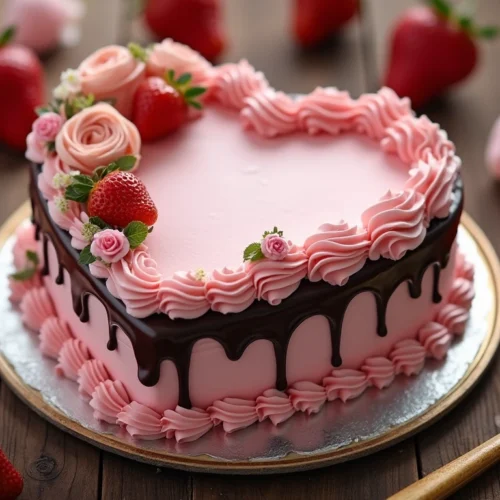
- Edible flowers, sprinkles, or candies: These little touches can make your cake pop with color and whimsy. Consider heart-shaped sprinkles, edible glitter, or delicate flowers like roses or violets for a romantic look.
- Chocolate chips or shavings: For a bit of texture and extra flavor.
- Fresh fruit: Sliced strawberries or raspberries can add a refreshing contrast to the sweetness of the cake.
Pro Tip: If you want to get a bit fancy with the design, you can make a simple glaze with powdered sugar and milk, or even try a ganache for a rich, glossy finish. And don’t be afraid to mix flavors! Chocolate cake with vanilla buttercream is always a winner, but you can try combining flavors like strawberry cake with whipped cream frosting or even lemon cake with a tangy cream cheese frosting.
With these ingredients on hand, you’re ready to move on to the next steps. It’s time to bring your heart cake to life!
Instructions for Making Your Heart Cake
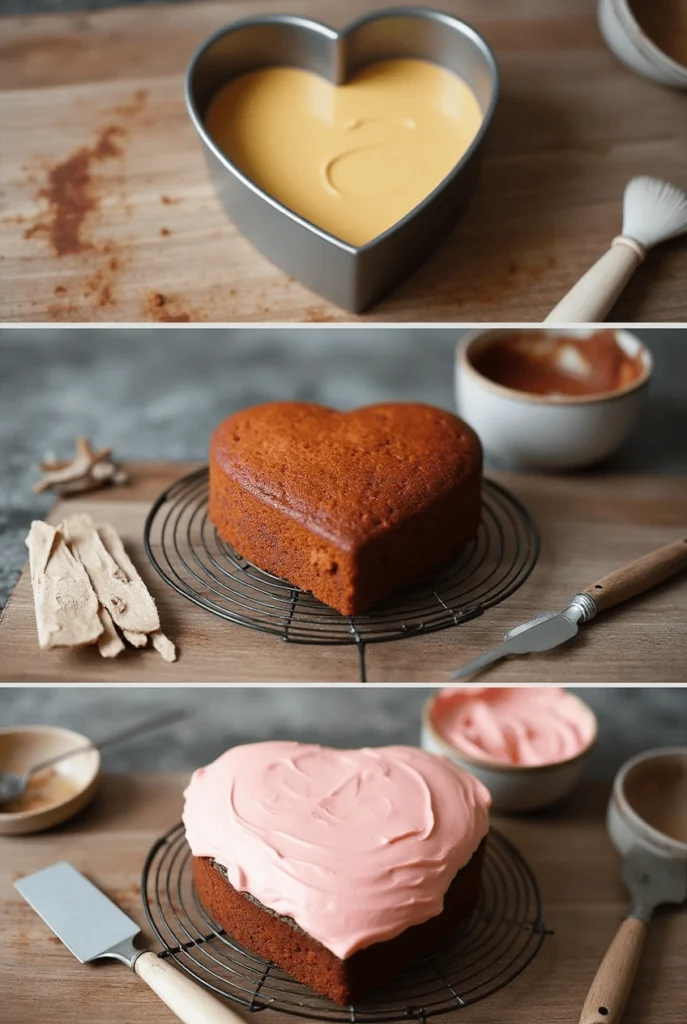
It’s time to bring your cake vision to life! Don’t worry, I’ll walk you through every step to ensure your heart-shaped cake turns out perfect. Grab your ingredients and follow these easy steps:
Step 1: Preheat and Prepare
Start by preheating your oven to 350°F (175°C). While the oven is heating up, grease and flour your heart-shaped cake pans. If you don’t have a heart-shaped pan, no problem—use a round pan and cut the cake into heart shapes once it’s baked!
Step 2: Mix Dry Ingredients
In a medium bowl, whisk together:
- 2 ½ cups all-purpose flour
- 2 tsp baking powder
This will help ensure your cake rises beautifully and has a light texture.
Step 3: Cream Butter and Sugar
In a large mixing bowl, use an electric mixer to cream together:
- 1 cup unsalted butter
- 1 ½ cups granulated sugar
Beat them together until the mixture is light and fluffy—this usually takes about 3-4 minutes. The key here is getting air into the batter for a soft, airy cake.
Step 4: Add Eggs and Vanilla
Add the 4 eggs one at a time, mixing well after each addition. Then, stir in 1 tsp vanilla extract for that lovely, comforting flavor.
Step 5: Combine Dry and Wet Ingredients
Gradually add the dry ingredients into the wet mixture, alternating with the 1 cup whole milk. Start with the dry ingredients, then add a little milk, and continue alternating until everything is just combined. Be careful not to overmix—this will help keep your cake tender.
Step 6: Bake
Pour the batter evenly into your prepared heart-shaped pans. Bake for 30-35 minutes or until a toothpick inserted into the center comes out clean. Each oven is different, so keep an eye on it toward the end of the baking time.
Step 7: Cool the Cakes
Once baked, remove the cakes from the oven and let them cool in the pans for about 10 minutes. Then, turn them out onto a wire rack to cool completely. It’s important not to rush this step—if the cake is too warm, your frosting could melt.
Step 8: Make the Frosting
While your cakes are cooling, make the frosting. In a large bowl, beat together:
- 1 cup unsalted butter
- 4 cups powdered sugar
- 2-3 tbsp heavy cream
- 1 tsp vanilla extract
Start mixing on low to avoid a powdered sugar storm! Gradually increase the speed and beat until the frosting is light, fluffy, and smooth. If you’re adding food coloring, now’s the time to mix it in until you achieve your desired shade.
Step 9: Frost and Decorate
Once your cakes are completely cool, spread a layer of frosting between the cake layers. Then, frost the top and sides of the entire cake, smoothing it out with an offset spatula. Don’t forget to get creative with your decoration! Add sprinkles, fresh fruit, or edible flowers to give it a personalized touch.
Step 10: Serve and Enjoy
Now comes the best part—enjoying your delicious creation! Slice it up, serve it on a beautiful plate, and savor the moment with your loved ones. The joy of sharing a homemade heart cake is truly special.
Pro Tip: If you’re not planning to serve the cake right away, store it in an airtight container at room temperature for up to 3 days. You can also refrigerate it if you want the frosting to hold its shape, but allow it to come to room temperature before serving for the best flavor and texture.
You’re all set to impress with your heart cake! Don’t forget to take a photo before it’s all gone—you’ll want to remember this sweet moment!
Pro Tips and Variations
Baking a heart cake is a fun and rewarding experience, and with these pro tips and creative variations, you can take your cake to the next level! Whether you’re a beginner or a seasoned baker, these ideas will help you perfect your heart cake and add a unique touch.
Pro Tips for Perfecting Your Heart Cake
- Room Temperature Ingredients: Always ensure your butter, eggs, and milk are at room temperature before starting. This helps the ingredients blend smoothly, resulting in a lighter and fluffier cake.
- Don’t Overmix: When combining the wet and dry ingredients, mix until just combined. Overmixing can lead to a dense and tough cake, and we’re aiming for light and airy here!
- Level the Cake Layers: Once your cakes are cooled, trim the tops to ensure they’re level. This will make stacking and frosting much easier, helping you achieve a smooth, professional finish.
- Use an Offset Spatula: For a smooth, even layer of frosting, an offset spatula is your best friend. It allows you to spread the frosting without disturbing the cake layers, giving you a flawless finish.
- Chill the Cake Before Decorating: If you want a smoother finish with less mess, chill the frosted cake for about 30 minutes before adding final touches like decorations or piping. This allows the frosting to firm up, so it’s easier to work with.
Creative Variations to Try
- Flavor Twists: While a classic vanilla or chocolate heart cake is always a hit, don’t be afraid to get creative with flavors! Try:
- Red Velvet: Add a festive touch with this velvety, slightly tangy cake. Pair it with cream cheese frosting for a delicious twist.
- Strawberry: For a lighter, fruity option, use strawberry cake mix or fresh pureed strawberries in the batter.
- Lemon: Brighten things up with a zesty lemon cake, topped with a lemon glaze or lemon buttercream frosting.
- Dietary Adjustments: You can easily adjust the recipe to fit dietary preferences:
- Gluten-Free: Swap out the all-purpose flour for a gluten-free baking blend.
- Vegan: Replace the eggs with flax eggs (1 tbsp flaxseed meal + 3 tbsp water = 1 egg) and use non-dairy butter and milk.
- Dairy-Free: Opt for plant-based butter and milk (such as almond or oat milk) for a delicious dairy-free alternative.
- Decorative Ideas:
- Ombre Effect: Create a stunning ombre effect by gradually changing the color of the frosting from light to dark as you spread it across the cake.
- Piping Flowers: Use a piping bag to add beautiful floral designs or intricate piping along the edges of the cake for a more elegant look.
- Heart Shaped Fondant: If you’re feeling fancy, roll out some fondant and cut it into heart shapes to decorate the top of the cake, adding a professional touch.
Storage and Make-Ahead Tips
- Make-Ahead: If you’re preparing for a big event, you can bake the cakes a day or two in advance. Simply wrap the cooled cake layers tightly in plastic wrap and store them at room temperature until you’re ready to frost and assemble.
- Storing Leftovers: Store any leftover heart cake in an airtight container at room temperature for up to 3 days. If you have a lot of leftovers, you can refrigerate it to help preserve the freshness, but be sure to let it come to room temperature before serving for the best taste and texture.
With these tips and variations, you’re all set to create a heart cake that’s truly your own. Have fun with the process, experiment with flavors and designs, and don’t forget to enjoy the sweet rewards of your hard work!
Serving Suggestions for Your Heart Cake
Once your heart cake is beautifully baked and decorated, it’s time to think about how you’ll serve it! Whether it’s for a romantic celebration, a special occasion, or just because you feel like spreading some sweetness, these serving ideas will take your cake to the next level. Let’s make sure it looks as good on the table as it tastes!
Classic Slice and Serve
The simplest and most classic way to serve your heart cake is by slicing it up and placing it on individual plates. Here are a few tips to elevate this serving style:
- Add a Dollop of Whipped Cream: Top each slice with a light, fluffy dollop of freshly whipped cream. This adds a rich yet airy contrast to the sweetness of the cake and frosting.
- Fresh Berries: Pair your cake with a handful of fresh berries like strawberries, raspberries, or blueberries. The natural tartness of the berries balances out the sweetness of the cake and makes for a lovely presentation.
Heart Cake as a Centerpiece
If you’re planning to serve the cake at a special event like an anniversary or Valentine’s Day gathering, consider using your heart cake as the centerpiece. This works wonderfully when paired with:
- Candied Flowers: Decorate your cake with edible flowers or candied violets for a stunning, elegant touch.
- Chocolate Ganache Drizzle: A glossy, rich chocolate ganache drizzle over the top of the cake gives it a decadent, professional look. You can let it drip down the sides for a more dramatic effect.
- Mini Heart Cakes: For a fun twist, consider making small individual heart cakes for each guest. Simply bake and frost small heart-shaped cakes and serve them with a personalized touch, like a handwritten tag or special topping for each person.
Perfect Pairings
When serving your heart cake, consider these delicious pairings to complement the flavors and enhance the experience:
- Coffee or Tea: A warm beverage like coffee, chai, or a floral herbal tea pairs beautifully with the rich, creamy frosting of your cake. Serve a pot of freshly brewed coffee or an aromatic tea alongside your slices for a cozy, intimate feel.
- Vanilla Ice Cream: For a rich and indulgent treat, serve slices of cake with a scoop of vanilla bean ice cream. The cold ice cream is a perfect contrast to the soft, moist cake.
- Sparkling Wine: If you’re celebrating, consider pairing your heart cake with a glass of chilled sparkling wine or champagne. The bubbles add a festive touch, making it feel like a true celebration.
Fun and Creative Serving Ideas
Looking for something a little more unique? Here are a few fun serving ideas:
- Cake Pops: After frosting your heart cake, cut it into small squares or circles and turn them into cake pops. Coat them in melted chocolate and sprinkles for a portable, fun treat.
- Heart Cake Parfaits: Layer crumbled pieces of your heart cake with whipped cream, fresh berries, and a drizzle of syrup in a mason jar or parfait glass for a fun, individual dessert.
- Cake Cups: Scoop portions of cake into clear cups, top with frosting and fruit, and create personalized mini desserts for guests.
Pro Tip: If you plan to serve your heart cake at a gathering, cut it into small slices, so it’s easy for guests to enjoy without feeling too indulgent. Smaller portions allow everyone to try a little bit of everything while still leaving room for other treats!
No matter how you choose to serve your heart cake, it’s bound to be a hit. Whether you’re going for a simple, homey vibe or a glamorous dessert table display, these suggestions will help you create the perfect experience.
Conclusion
Congratulations on creating your beautiful heart cake! Whether it’s for a special occasion or just a simple treat to share with loved ones, this recipe is sure to bring smiles to everyone who enjoys it. A heart-shaped cake is more than just a dessert; it’s a heartfelt gesture that makes any moment sweeter.
Why You’ll Love This Cake
- Versatile: The beauty of this cake lies in its versatility. You can personalize it with any flavor, frosting, and decorations, making it perfect for any occasion—whether it’s Valentine’s Day, an anniversary, or just a spontaneous act of love.
- Simple Yet Stunning: Despite its impressive look, this heart cake is easy to make! With a few basic ingredients and some creative decorating, you’ll create a dessert that looks like it came from a bakery.
- Perfect for Sharing: This cake is ideal for sharing with friends and family. Its sweet, soft texture and light, flavorful frosting make it a crowd-pleaser at any celebration.
The Joy of Baking
Baking this heart cake is not only about following a recipe—it’s about the joy of creating something from scratch, the satisfaction of getting your hands a little messy, and the happiness of sharing your creation with others. Every bite of this cake is a labor of love, and there’s nothing more rewarding than seeing others enjoy the fruits of your effort.
So whether you’re planning a romantic dinner, a family celebration, or just treating yourself, this heart cake is the perfect dessert to express love and care. Have fun with it, try new variations, and most importantly, enjoy the process!
Now it’s time to slice into your creation and savor the sweet results. Happy baking, and remember, the best part is always sharing your treats with those you love!
________________
Heart Cake
Ingredients
For the Cake Base:
- 2 ½ cups all-purpose flour: This is the foundation of your cake giving it structure and lightness.
- 2 tsp baking powder: To help the cake rise and achieve that perfect fluffy texture.
- 1 cup unsalted butter softened: This adds richness and moisture to the cake.
- 1 ½ cups granulated sugar: Sweetness is key! This balances out the richness of the butter.
- 4 large eggs: Eggs help bind the ingredients together and provide structure.
- 1 tsp vanilla extract: A must for that warm inviting flavor.
- 1 cup whole milk: Adds moisture and helps achieve the perfect cake crumb.
For the Frosting:
- 1 cup unsalted butter softened: Creamy butter forms the base of a rich, smooth frosting.
- 4 cups powdered sugar: This gives the frosting that dreamy fluffy texture.
- 2-3 tbsp heavy cream: Helps to achieve the right consistency for spreading and piping.
- 1 tsp vanilla extract: For a sweet aromatic flavor.
- Food coloring optional: Want a vibrant red, pink, or pastel-colored frosting? This is your chance to get creative!
For Decoration (Optional):
- Edible flowers sprinkles, or candies: These little touches can make your cake pop with color and whimsy. Consider heart-shaped sprinkles, edible glitter, or delicate flowers like roses or violets for a romantic look.
- Chocolate chips or shavings: For a bit of texture and extra flavor.
- Fresh fruit: Sliced strawberries or raspberries can add a refreshing contrast to the sweetness of the cake.
Instructions
Step 1: Preheat and Prepare
- Start by preheating your oven to 350°F (175°C). While the oven is heating up, grease and flour your heart-shaped cake pans. If you don’t have a heart-shaped pan, no problem—use a round pan and cut the cake into heart shapes once it’s baked!
Step 2: Mix Dry Ingredients
- In a medium bowl, whisk together:
- 2 ½ cups all-purpose flour
- 2 tsp baking powder
- This will help ensure your cake rises beautifully and has a light texture.
Step 3: Cream Butter and Sugar
- In a large mixing bowl, use an electric mixer to cream together:
- 1 cup unsalted butter
- 1 ½ cups granulated sugar
- Beat them together until the mixture is light and fluffy—this usually takes about 3-4 minutes. The key here is getting air into the batter for a soft, airy cake.
Step 4: Add Eggs and Vanilla
- Add the 4 eggs one at a time, mixing well after each addition. Then, stir in 1 tsp vanilla extract for that lovely, comforting flavor.
Step 5: Combine Dry and Wet Ingredients
- Gradually add the dry ingredients into the wet mixture, alternating with the 1 cup whole milk. Start with the dry ingredients, then add a little milk, and continue alternating until everything is just combined. Be careful not to overmix—this will help keep your cake tender.
Step 6: Bake
- Pour the batter evenly into your prepared heart-shaped pans. Bake for 30-35 minutes or until a toothpick inserted into the center comes out clean. Each oven is different, so keep an eye on it toward the end of the baking time.
Step 7: Cool the Cakes
- Once baked, remove the cakes from the oven and let them cool in the pans for about 10 minutes. Then, turn them out onto a wire rack to cool completely. It’s important not to rush this step—if the cake is too warm, your frosting could melt.
Step 8: Make the Frosting
- While your cakes are cooling, make the frosting. In a large bowl, beat together:
- 1 cup unsalted butter
- 4 cups powdered sugar
- 2-3 tbsp heavy cream
- 1 tsp vanilla extract
- Start mixing on low to avoid a powdered sugar storm! Gradually increase the speed and beat until the frosting is light, fluffy, and smooth. If you’re adding food coloring, now’s the time to mix it in until you achieve your desired shade.
Step 9: Frost and Decorate
- Once your cakes are completely cool, spread a layer of frosting between the cake layers. Then, frost the top and sides of the entire cake, smoothing it out with an offset spatula. Don’t forget to get creative with your decoration! Add sprinkles, fresh fruit, or edible flowers to give it a personalized touch.
Step 10: Serve and Enjoy
- Now comes the best part—enjoying your delicious creation! Slice it up, serve it on a beautiful plate, and savor the moment with your loved ones. The joy of sharing a homemade heart cake is truly special.
Pro Tip: If you’re not planning to serve the cake right away, store it in an airtight container at room temperature for up to 3 days. You can also refrigerate it if you want the frosting to hold its shape, but allow it to come to room temperature before serving for the best flavor and texture.
Notes
- Calories: 350
- Fat: 18g
- Saturated Fat: 10g
- Trans Fat: 0g
- Carbohydrates: 46g
- Fiber: 1g
- Sugars: 35g
- Protein: 3g
- Cholesterol: 60mg
- Sodium: 150mg
- Potassium: 150mg
- Calcium: 20mg
- Iron: 1mg
FAQs
Baking a heart cake is a delightful experience, but we know you might have a few questions along the way. To make sure your cake turns out perfect, here are some of the most common questions answered, along with helpful tips.
Can I use a different cake pan shape?
Absolutely! While a heart-shaped pan adds a special touch, you can easily adapt this recipe to any cake pan. If you don’t have a heart-shaped pan, try using a round, square, or even a cupcake pan. After baking, you can cut the cake into heart shapes using a cookie cutter or knife.
How can I make my heart cake moist?
To keep your cake moist and tender, be sure not to overmix the batter—mixing just until combined is key. Additionally, using full-fat ingredients like butter and whole milk, and adding a touch of sour cream or yogurt, can help create a moist texture. Remember to let the cake cool completely before frosting it, as this helps maintain its moisture.
Can I make the cake ahead of time?
Yes, this heart cake can be made in advance! Once baked and completely cooled, wrap the cake layers in plastic wrap and store them at room temperature for up to two days. You can also freeze the cake layers for up to a month. When ready to assemble, thaw the cake at room temperature, frost it, and decorate as usual.
How do I store leftover heart cake?
Store any leftover cake in an airtight container at room temperature for up to 3 days. If you need to keep it longer, you can refrigerate it, but be sure to let it come to room temperature before serving for the best taste and texture.
Can I decorate the heart cake in advance?
Yes, you can decorate the cake ahead of time! If you’re preparing for a party or event, decorate your cake a day in advance and store it in a cool, dry place or in the fridge. Just remember that some decorations (like fresh fruit) are best added right before serving to maintain their freshness
What can I use if I don’t have heavy cream for frosting?
If you don’t have heavy cream on hand for your frosting, you can substitute it with milk or half-and-half. However, using heavy cream will give you a richer, fluffier frosting. For a dairy-free version, opt for coconut cream or any plant-based heavy cream alternative.
How can I make the frosting less sweet?
If you find the frosting too sweet for your liking, try reducing the amount of powdered sugar and adding a pinch of salt to balance out the sweetness. You can also experiment with different types of frosting, such as cream cheese frosting, which has a tangy flavor that pairs well with a sweet cake.
What are some creative decorating ideas?
The possibilities for decorating your heart cake are endless! Some fun ideas include:
Ombre frosting: Gradually shift the color of your frosting from light to dark for a stunning ombre effect.
Fondant shapes: Use fondant to create intricate decorations, like flowers, hearts, or geometric patterns.
Fresh flowers: Decorate the top with edible flowers, like pansies or violets, for a fresh and elegant look.
Chocolate drizzle: Add a glossy drizzle of melted chocolate over the top for a luxurious, shiny finish
We hope these answers help you create the perfect heart cake! Don’t forget—baking is about having fun and experimenting. Feel free to try new flavors, frosting combinations, and decorative ideas to make this cake truly your own. Happy baking

