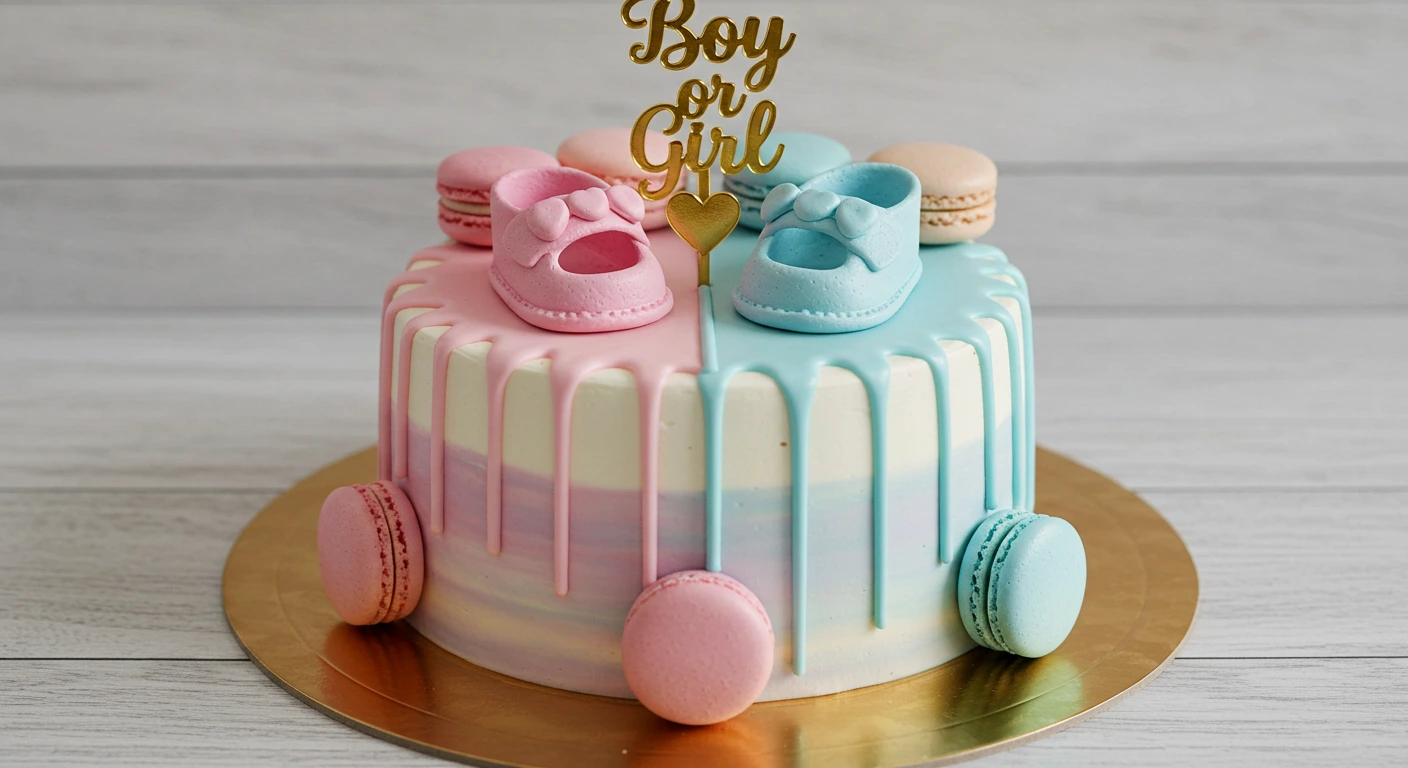
Gender reveal cakes have become the centerpiece of celebrations, bringing excitement and joy to an unforgettable moment. If you’re looking for creative gender reveal cake ideas that will truly wow your guests, you’re in the right place! Whether you’re planning an intimate gathering or a big celebration, these stunning cakes not only reveal your little one’s gender but also add a personal touch to the event. With endless cake variations and decorating possibilities, your gender reveal cake can be as unique as the baby on the way. Let’s dive into how to create a memorable cake that everyone will be talking about long after the party ends!
Table of Contents
Key Benefits of a Gender Reveal Cake
Choosing the perfect gender reveal cake brings many benefits that elevate your celebration:
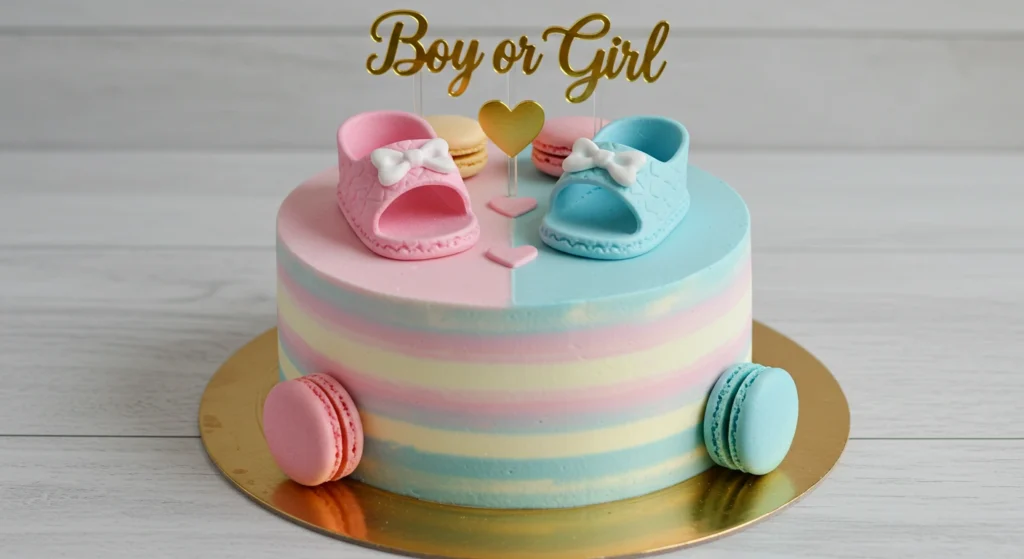
- Excitement and Surprise: Nothing beats the joy of revealing the baby’s gender with a slice of cake! The unexpected burst of color is a thrilling experience for both the parents and guests.
- Customizable Designs: Whether you prefer a classic or trendy design, there are countless ways to customize your cake. You can go bold with gender-neutral cakes or embrace the traditional blue or pink themes.
- Fun for All Ages: Gender reveal cakes aren’t just for adults—children and guests of all ages love guessing and revealing the cake’s hidden surprise.
- Creates Lasting Memories: The joy of watching the cake reveal the gender is a moment that’s sure to be captured in photographs and remembered for years.
- Visually Stunning: A well-designed gender reveal cake makes for a beautiful and colorful centerpiece, setting the tone for your entire event.
Ingredients for a Perfect Gender Reveal Cake
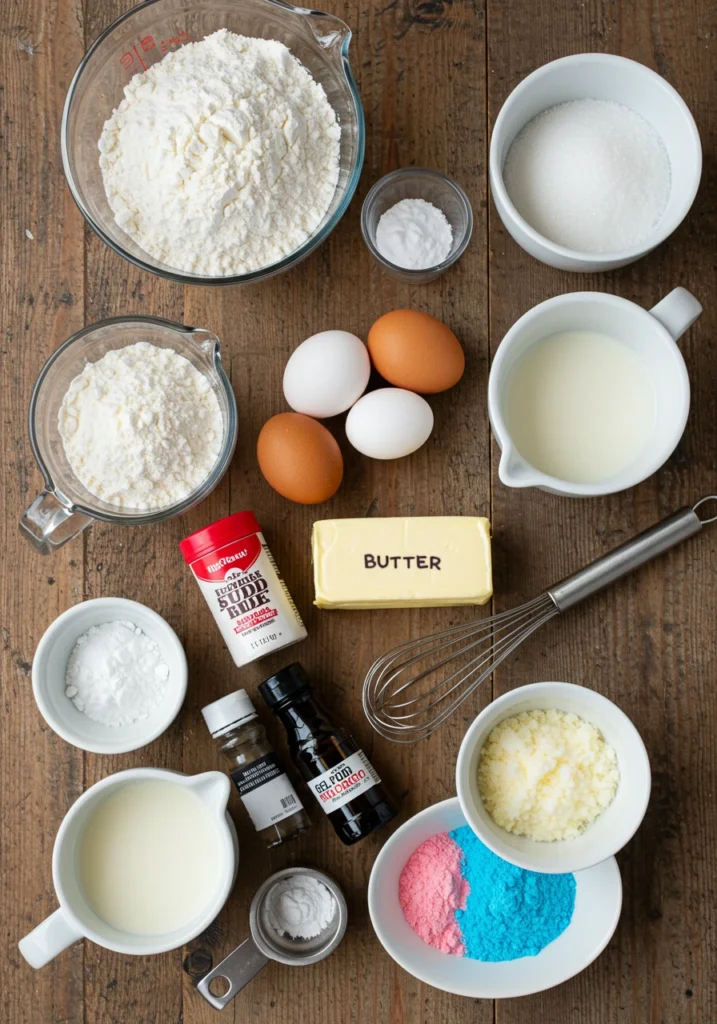
To create a delicious gender reveal cake that will impress your guests, you’ll need a few key ingredients. Here’s what you’ll need to make the perfect cake and frosting, ensuring it’s not only visually stunning but also deliciously moist and flavorful.
Cake Ingredients:
- 2 cups all-purpose flour – This is the base for your cake. Make sure to sift it to avoid lumps and create a lighter texture.
- 1 cup granulated sugar – For the sweetness that balances the flavor and brings out the richness of the butter.
- 1 cup unsalted butter (room temperature) – Softened butter creates a smooth batter and ensures your cake will be moist and tender.
- 3 large eggs – Eggs help bind the ingredients together and add structure to the cake.
- 1 cup milk – For moisture and a tender crumb. You can substitute with almond milk for a dairy-free option.
- 1 tablespoon vanilla extract – A must-have for that classic vanilla flavor. It pairs beautifully with most cake flavor combinations.
- 1 tablespoon baking powder – To help your cake rise and achieve that perfect fluffy texture.
- Food coloring (blue or pink) – This is the magic ingredient for the gender reveal! Use gel-based food coloring to avoid altering the consistency of the batter.
Frosting Ingredients:
- 2 cups powdered sugar – This forms the base for your frosting and gives it that sweet, smooth texture.
- 1 cup unsalted butter (room temperature) – Just like in the cake, softened butter is key to making a creamy, spreadable frosting.
- 1 teaspoon vanilla extract – For extra flavor to enhance the richness of the buttercream.
- 2 tablespoons milk – Helps thin out the frosting and achieve a perfect spreading consistency. Adjust the amount depending on how thick or thin you like your frosting.
- Food coloring (optional) – If you want to match your frosting to the gender reveal theme, add a few drops of food coloring.
Pro Tip:
When choosing your food coloring, opt for gel food coloring instead of liquid. Gel colors are more concentrated and won’t affect the consistency of your batter or frosting. You can always add more if you want a deeper color.
These simple ingredients are all you need to create a stunning, flavorful gender reveal cake. Ready to bake? Let’s move on to the next step and bring this cake to life!
Instructions for Making a Gender Reveal Cake
Now that you have your ingredients ready, let’s dive into the fun part—baking your gender reveal cake! Follow these easy steps, and soon you’ll have a delicious and exciting cake to unveil at your celebration.
1. Preheat Your Oven
Start by preheating your oven to 350°F (175°C). This ensures it’s nice and hot, ready to bake your cake evenly and perfectly.
2. Prepare the Cake Pans
Grease and line two 8-inch round cake pans with parchment paper. This step will help your cake come out smoothly after baking, preventing any sticking and ensuring clean, neat layers.
3. Cream the Butter and Sugar
In a large mixing bowl, cream the unsalted butter and granulated sugar together using an electric mixer. Beat until the mixture is light and fluffy—this will give your cake its soft texture.
4. Add the Eggs and Vanilla
Add the eggs one at a time, beating well after each addition. Stir in the vanilla extract for that classic, comforting flavor. The batter should look smooth and creamy.
5. Combine the Dry Ingredients
In a separate bowl, sift together the all-purpose flour, baking powder, and a pinch of salt. Sifting ensures no lumps and that the dry ingredients are evenly distributed.
6. Mix Wet and Dry Ingredients
Slowly add the dry ingredients to the wet mixture, alternating with the milk. Start and finish with the dry ingredients. Stir gently until everything is just combined. Be sure not to overmix the batter to keep the cake light and fluffy.
7. Divide and Color the Batter
Now comes the fun part! Divide the batter into two bowls. Add food coloring (pink or blue) to one of the bowls and gently mix until the color is evenly spread throughout the batter. You should have one bowl of plain batter and one vibrant colored batter.
8. Layer the Batter in the Pans
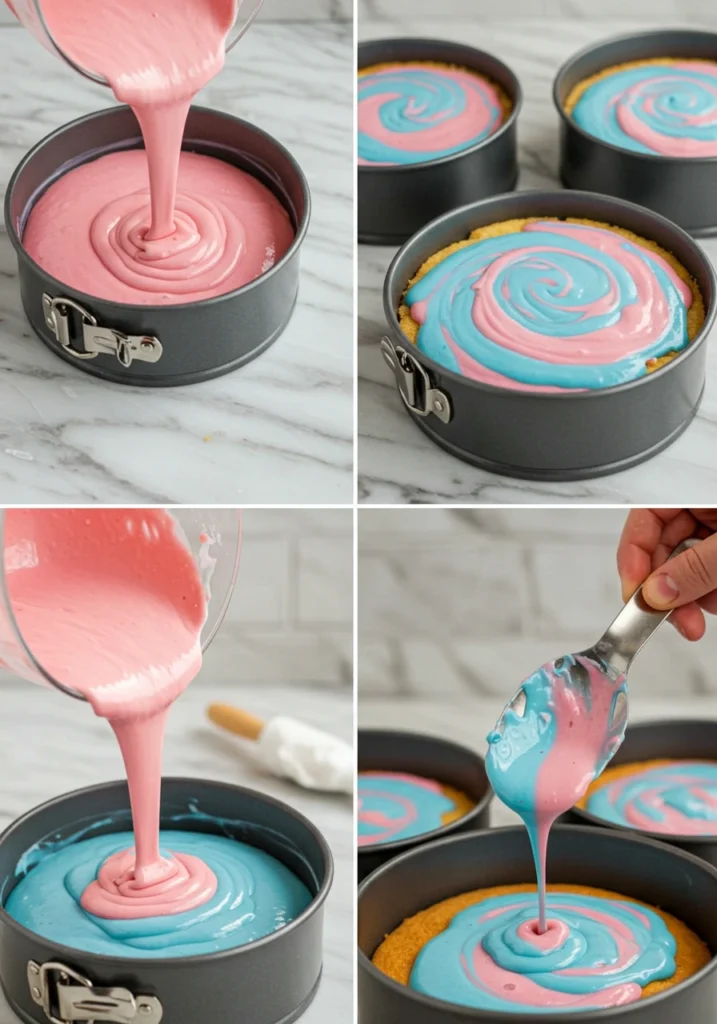
Pour the plain batter into one of the prepared pans, then add the colored batter on top. You can either pour it in the center for neat layers or swirl the two batters together for a marble effect. The excitement builds as the color slowly mixes with the plain batter!
9. Bake the Cake
Place the pans in the oven and bake for 25–30 minutes. You’ll know the cake is done when a toothpick inserted into the center comes out clean. Keep a close eye on it toward the end of the baking time to avoid overbaking.
10. Cool the Cakes
Let the cakes cool in their pans for about 10–15 minutes. After that, transfer them to a wire rack to cool completely. It’s essential that they’re completely cooled before frosting to prevent melting your frosting.
11. Frost the Cake
Once your cakes have cooled, it’s time to frost! Spread a thin layer of frosting on the first layer, then stack the second layer on top. Coat the entire cake with a generous amount of frosting. Use a spatula to smooth the frosting for a clean, professional finish.
12. Decorate
Now, for the fun reveal part! Decorate the top of your cake with sprinkles, edible glitter, or a cake topper that matches your party theme. If you want an extra surprise, you can add a few sprinkles of colored sugar or small candy inside the cake before frosting, so it spills out when the cake is cut.
Pro Tip:
For a smooth frosting finish, use an offset spatula to spread the frosting and chill the cake for 10–15 minutes before adding a final layer. This helps firm up the frosting and creates a perfect finish.
Your gender reveal cake is now ready to steal the show! Whether you’re using pink or blue or experimenting with new colors and flavors, this cake will definitely impress your guests.
Pro Tips and Variations for Your Gender Reveal Cake
Creating the perfect gender reveal cake isn’t just about following the steps—it’s about adding your personal touch and making it uniquely yours! Whether you’re looking to get creative with flavors or experiment with decorations, here are some pro tips and fun variations to take your cake to the next level.
Pro Tips for Perfect Cake Layers
- Avoid Overmixing: When mixing the batter, be gentle. Overmixing can lead to a dense cake, and we want a light, fluffy texture. Mix just until everything is combined for the best results.
- Room Temperature Ingredients: Ensure that your butter, eggs, and milk are at room temperature before you start. This helps create a smoother batter and results in an even texture throughout the cake.
- Use Gel Food Coloring: Gel food coloring is more concentrated than liquid coloring, so it won’t affect the texture of your cake. Plus, it gives you vibrant, consistent colors for the big reveal!
Fun Variations for Your Gender Reveal Cake
- Flavor Variations: Don’t limit yourself to a basic vanilla cake! Here are some exciting flavor ideas:
- Chocolate Cake: Swap in cocoa powder for a rich, decadent chocolate gender reveal cake.
- Lemon Cake: Add a fresh twist with a zesty lemon cake base. It’s a delightful contrast to the sweetness of the frosting.
- Funfetti Cake: For an extra surprise, fold colorful sprinkles into the batter to create a fun confetti effect inside the cake. Your guests will love the added texture!
- Hidden Layer Reveal: Want an even more dramatic reveal? Try adding a layer of colored frosting or candy confetti inside the cake to surprise your guests when they cut the first slice. This unexpected twist adds to the excitement!
- Ombre Effect: For a beautiful, modern twist, create an ombre effect inside the cake. Use different shades of pink or blue for a stunning layered reveal. Each slice will be a visual treat!
Decorating Tips for a Show-Stopping Cake
- Simple Buttercream Finish: If you want a smooth, clean look, apply a crumb coat first. This is a thin layer of frosting that seals in crumbs. After chilling the cake for 15–20 minutes, apply the final coat of frosting for a flawless finish.
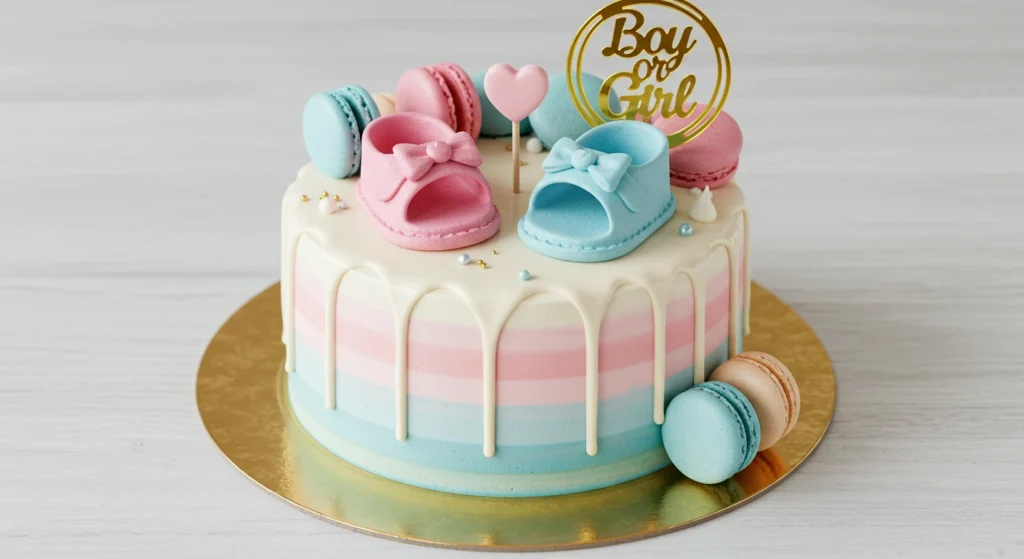
- Fondant Decorations: For a more polished, professional look, consider using fondant. You can create custom cake toppers like baby booties, gender symbols, or even the words “It’s a Boy” or “It’s a Girl” for an extra special touch.
- Sprinkles & Edible Glitter: Add some sparkle to your cake by finishing it off with edible glitter or fun, gender-themed sprinkles. These little details give your cake a festive look and make it stand out at any party.
- Themed Cake Toppers: Use cake toppers to bring your party’s theme to life. Whether it’s balloons, baby animals, or a cute “gender reveal” sign, a topper can help elevate the presentation without requiring elaborate decorating skills.
Non-Traditional Gender Reveal Cake Ideas
- Neutral Cakes: If you’re going for a more inclusive or non-traditional approach, you can opt for a neutral-colored cake. Think gold, silver, or white with a pop of color inside. You can still make it just as exciting with a surprise color or sprinkle-filled interior!
- Cupcake Version: For an alternative to a large cake, consider making individual gender reveal cupcakes. Each guest can enjoy their own mini reveal when they bite into the cupcake to discover the hidden color inside.
Make It Gluten-Free or Dairy-Free
- Gluten-Free Cake: Swap the all-purpose flour with a gluten-free flour blend. It will work just as well in this recipe, and your gluten-sensitive guests will appreciate it!
- Dairy-Free Option: Use dairy-free butter and almond milk (or any other non-dairy milk of your choice) to create a completely dairy-free cake. It’s an easy switch that ensures everyone can enjoy the celebration.
Pro Tip:
Be sure to bake a test cake before your big day to perfect the technique, especially if you’re using a new flavor or decoration method. It’s always a good idea to try out your design and make adjustments before you wow your guests!
With these tips and variations, you’re sure to create a gender reveal cake that’s as delicious as it is memorable. Whether you stick to the classic blue or pink or get creative with flavors and decorations, your cake will be the star of the party!
Serving Suggestions for Your Gender Reveal Cake
Once your gender reveal cake is perfectly baked and decorated, it’s time to think about how to serve it to your guests. After all, this cake isn’t just about looks—it’s about creating an unforgettable moment at your celebration! Here are some fun and creative serving suggestions to make your reveal even more exciting and memorable.
1. Serve in Generous Slices
While it’s tempting to make each slice as small as possible to prolong the excitement, generous slices will let everyone enjoy the full experience of the reveal. Plus, a big slice of cake is always a crowd-pleaser! You can create small cake stations for guests to help themselves or serve slices on platters for a more formal feel.
2. Color-Coordinated Drinks
To match the theme, offer drinks that complement the colors of the cake. For example:
- Pink Lemonade or Rose Lemonade for a girl reveal
- Blue Punch or Blueberry Soda for a boy reveal
- For a neutral theme, offer sparkling water with a splash of fruit juice for a refreshing, colorful touch.
This little detail will bring your party theme to life and add an extra layer of excitement when your guests realize it’s all part of the reveal!
3. Gender Reveal Cupcakes for Everyone
If you want everyone to be part of the surprise, consider baking individual gender reveal cupcakes. These mini versions of your cake can be filled with the same colored frosting or candy for an easy way for each guest to join in on the fun. These are especially great for guests who may prefer a personal, smaller serving or if you’re hosting a larger crowd.
4. Display a Cake Topper or Sign
To make the cake even more visually appealing, add a fun cake topper or gender reveal sign at the center. Consider using a cute topper that says “It’s a Boy!” or “It’s a Girl!” to set the tone before the cake is cut. If you’re aiming for a more rustic look, you can create a custom sign using wood or craft paper that fits the theme of your party.
5. Pair with a Dessert Table
Turn your gender reveal cake into the centerpiece of a full dessert table. Surround it with cupcakes, cookies, and candies that match the color theme. This makes your party more visually striking and gives guests a variety of treats to choose from. You can add cookies shaped like baby booties or gender symbols for an extra touch.
6. Serve with Ice Cream or Whipped Cream
For an indulgent twist, serve slices of your cake with a scoop of vanilla or chocolate ice cream or a dollop of freshly whipped cream. Not only will this make your cake even more delicious, but it’ll also add a fun, comforting feel to your party.
7. Make a Cake Pop Station
If you’re hosting a larger event or want to make your gender reveal even more interactive, set up a cake pop station where guests can dip mini cake pops into colored frosting or sprinkles. It’s an engaging way to get everyone involved while indulging in something sweet!
Pro Tip:
If you’re serving the cake after the reveal, consider adding a decorative touch to the serving plates. A sprinkle of powdered sugar or edible glitter can make the presentation even more enchanting and exciting.
With these fun and creative serving suggestions, you can enhance your gender reveal cake and turn it into a true showstopper. Whether you go for a traditional slice or try something new with cupcakes or cake pops, your guests will enjoy every bite while celebrating the special moment with you!
Conclusion: Why a Gender Reveal Cake is the Perfect Touch
Congratulations! Your gender reveal cake is ready to make its grand entrance, and we hope these steps have helped you craft the perfect dessert for your special occasion. Whether you’re revealing a little boy or girl, or simply celebrating with a neutral theme, this cake is sure to leave a lasting impression on your guests.
Create a Memorable Moment
This cake is more than just a dessert—it’s a celebration of love, excitement, and new beginnings. By adding a personal touch to your cake and decorating it to match your party theme, you’re creating a moment that everyone will remember. The fun part isn’t just cutting the cake; it’s the joy that comes from seeing your guests’ reactions as they experience the reveal!
A Recipe for All Occasions
The versatility of this recipe makes it perfect for other events too! You can adapt it for birthdays, baby showers, or even anniversaries—simply change up the colors and decorations to match your occasion. It’s a fun, customizable recipe that will work for almost any special celebration.
A Few Final Tips
- Practice Your Decorating Skills: If you’re nervous about decorating, try practicing your frosting technique on a test cake. You’ll gain more confidence and ensure your cake looks stunning.
- Fresh Ingredients Make a Difference: For the best results, always use fresh, high-quality ingredients. Fresh butter, eggs, and vanilla will contribute to a more flavorful and moist cake.
- Add Some Personal Flair: Whether it’s through a personalized cake topper, themed sprinkles, or a special message on top, adding a personal touch makes the reveal even more unique.
By following this recipe, you’ll not only have a delicious cake to serve but also a stunning centerpiece that adds excitement to the occasion. So, gather your ingredients, get creative with the decorations, and prepare for an unforgettable gender reveal moment!
Enjoy baking, and remember—this cake is more than just a treat; it’s part of a celebration that will be cherished for years to come!
_____________________________
Gender Reveal Cake
Ingredients
Cake Ingredients:
- 2 cups all-purpose flour – This is the base for your cake. Make sure to sift it to avoid lumps and create a lighter texture.
- 1 cup granulated sugar – For the sweetness that balances the flavor and brings out the richness of the butter.
- 1 cup unsalted butter room temperature – Softened butter creates a smooth batter and ensures your cake will be moist and tender.
- 3 large eggs – Eggs help bind the ingredients together and add structure to the cake.
- 1 cup milk – For moisture and a tender crumb. You can substitute with almond milk for a dairy-free option.
- 1 tablespoon vanilla extract – A must-have for that classic vanilla flavor. It pairs beautifully with most cake flavor combinations.
- 1 tablespoon baking powder – To help your cake rise and achieve that perfect fluffy texture.
- Food coloring blue or pink – This is the magic ingredient for the gender reveal! Use gel-based food coloring to avoid altering the consistency of the batter.
Frosting Ingredients:
- 2 cups powdered sugar – This forms the base for your frosting and gives it that sweet smooth texture.
- 1 cup unsalted butter room temperature – Just like in the cake, softened butter is key to making a creamy, spreadable frosting.
- 1 teaspoon vanilla extract – For extra flavor to enhance the richness of the buttercream.
- 2 tablespoons milk – Helps thin out the frosting and achieve a perfect spreading consistency. Adjust the amount depending on how thick or thin you like your frosting.
- Food coloring optional – If you want to match your frosting to the gender reveal theme, add a few drops of food coloring.
Instructions
Preheat Your Oven
- Start by preheating your oven to 350°F (175°C). This ensures it’s nice and hot, ready to bake your cake evenly and perfectly.
Prepare the Cake Pans
- Grease and line two 8-inch round cake pans with parchment paper. This step will help your cake come out smoothly after baking, preventing any sticking and ensuring clean, neat layers.
Cream the Butter and Sugar
- In a large mixing bowl, cream the unsalted butter and granulated sugar together using an electric mixer. Beat until the mixture is light and fluffy—this will give your cake its soft texture.
Add the Eggs and Vanilla
- Add the eggs one at a time, beating well after each addition. Stir in the vanilla extract for that classic, comforting flavor. The batter should look smooth and creamy.
Combine the Dry Ingredients
- In a separate bowl, sift together the all-purpose flour, baking powder, and a pinch of salt. Sifting ensures no lumps and that the dry ingredients are evenly distributed.
Mix Wet and Dry Ingredients
- Slowly add the dry ingredients to the wet mixture, alternating with the milk. Start and finish with the dry ingredients. Stir gently until everything is just combined. Be sure not to overmix the batter to keep the cake light and fluffy.
Divide and Color the Batter
- Now comes the fun part! Divide the batter into two bowls. Add food coloring (pink or blue) to one of the bowls and gently mix until the color is evenly spread throughout the batter. You should have one bowl of plain batter and one vibrant colored batter.
Layer the Batter in the Pans
- Pour the plain batter into one of the prepared pans, then add the colored batter on top. You can either pour it in the center for neat layers or swirl the two batters together for a marble effect. The excitement builds as the color slowly mixes with the plain batter!
Bake the Cake
- Place the pans in the oven and bake for 25–30 minutes. You’ll know the cake is done when a toothpick inserted into the center comes out clean. Keep a close eye on it toward the end of the baking time to avoid overbaking.
Cool the Cakes
- Let the cakes cool in their pans for about 10–15 minutes. After that, transfer them to a wire rack to cool completely. It’s essential that they’re completely cooled before frosting to prevent melting your frosting.
Frost the Cake
- Once your cakes have cooled, it’s time to frost! Spread a thin layer of frosting on the first layer, then stack the second layer on top. Coat the entire cake with a generous amount of frosting. Use a spatula to smooth the frosting for a clean, professional finish.
Decorate
- Now, for the fun reveal part! Decorate the top of your cake with sprinkles, edible glitter, or a cake topper that matches your party theme. If you want an extra surprise, you can add a few sprinkles of colored sugar or small candy inside the cake before frosting, so it spills out when the cake is cut.
Notes
- Calories: 325 kcal
- Fat: 18g
- Carbohydrates: 38g
- Protein: 3g
- Sugar: 28g
- Fiber: 0g
- Cholesterol: 45mg
- Sodium: 180mg
- Calcium: 35mg
- Iron: 0.6mg
FAQs About Gender Reveal Cakes
To help you with your gender reveal cake journey, we’ve gathered answers to some of the most common questions we receive. Whether you’re a first-time baker or looking to perfect your skills, these tips will ensure you make a cake that’s both delicious and memorable.
1. How do I make sure the colored cake batter doesn’t mix?
To keep your batter layers distinct and prevent mixing, pour the plain batter first into the cake pans. Then, gently add the colored batter on top. If you’re feeling creative, use a spoon or spatula to swirl the two together for a marble effect, but don’t stir too much—this will help maintain the visual surprise when the cake is cut!
2. Can I use store-bought frosting?
Absolutely! While homemade frosting is always delicious, using store-bought frosting can save you time and effort. Just choose a quality frosting that complements your cake flavor. If you’re going for a unique touch, consider adding a few drops of vanilla extract or lemon zest to enhance the flavor of the store-bought frosting.
3. Can I make the cake ahead of time?
Yes! You can bake the cake layers up to 2 days in advance. Simply wrap the cooled cake layers tightly in plastic wrap and store them in an airtight container at room temperature. When you’re ready to decorate, let them come to room temperature before frosting.
4. What type of food coloring should I use for the cake?
Gel food coloring is highly recommended for vivid and long-lasting color. It’s more concentrated than liquid food coloring, so you need just a small amount to achieve the desired hue. Gel colors also prevent the cake batter from becoming too thin, which can affect the texture of your cake.
5. How do I ensure the cake layers bake evenly?
Make sure your oven is preheated and use an oven thermometer to check that it’s at the correct temperature. Also, try rotating the cake pans halfway through baking to ensure even heat distribution. This simple step can help prevent uneven layers or over-browning.
6. How do I know when the cake is done?
The best way to check if your cake is done is by inserting a toothpick or cake tester into the center. If it comes out clean or with just a few crumbs attached, the cake is ready. If the toothpick comes out with wet batter, give the cake a few more minutes.
7. Can I add a filling to the cake?
Yes, you can! Consider adding a filling of your choice, such as lemon curd, jam, or chocolate ganache, between the layers for extra flavor. Just be sure the filling isn’t too runny, as it may affect the structure of the cake.
8. How do I store leftover cake?
Store leftover cake in an airtight container at room temperature for up to 3 days. If you want to keep it fresh for longer, wrap it tightly in plastic wrap and place it in the fridge for up to a week. For longer storage, you can freeze the cake for up to 3 months—just be sure to wrap it well to prevent freezer burn.
9. Can I use a different flavor of cake mix?
Absolutely! While this recipe uses a classic vanilla cake mix, feel free to get creative with different flavors. Chocolate cake, funfetti, or even a lemon-flavored cake would all work wonderfully for a gender reveal. Just make sure to adjust the baking time according to the flavor of the cake you’re using.
We hope these answers clear up any questions you might have and help you feel more confident about baking your gender reveal cake! Don’t hesitate to get creative and make this cake your own. Enjoy the process, and most importantly, have fun with the celebration!

